Adding and Editing Vouchers
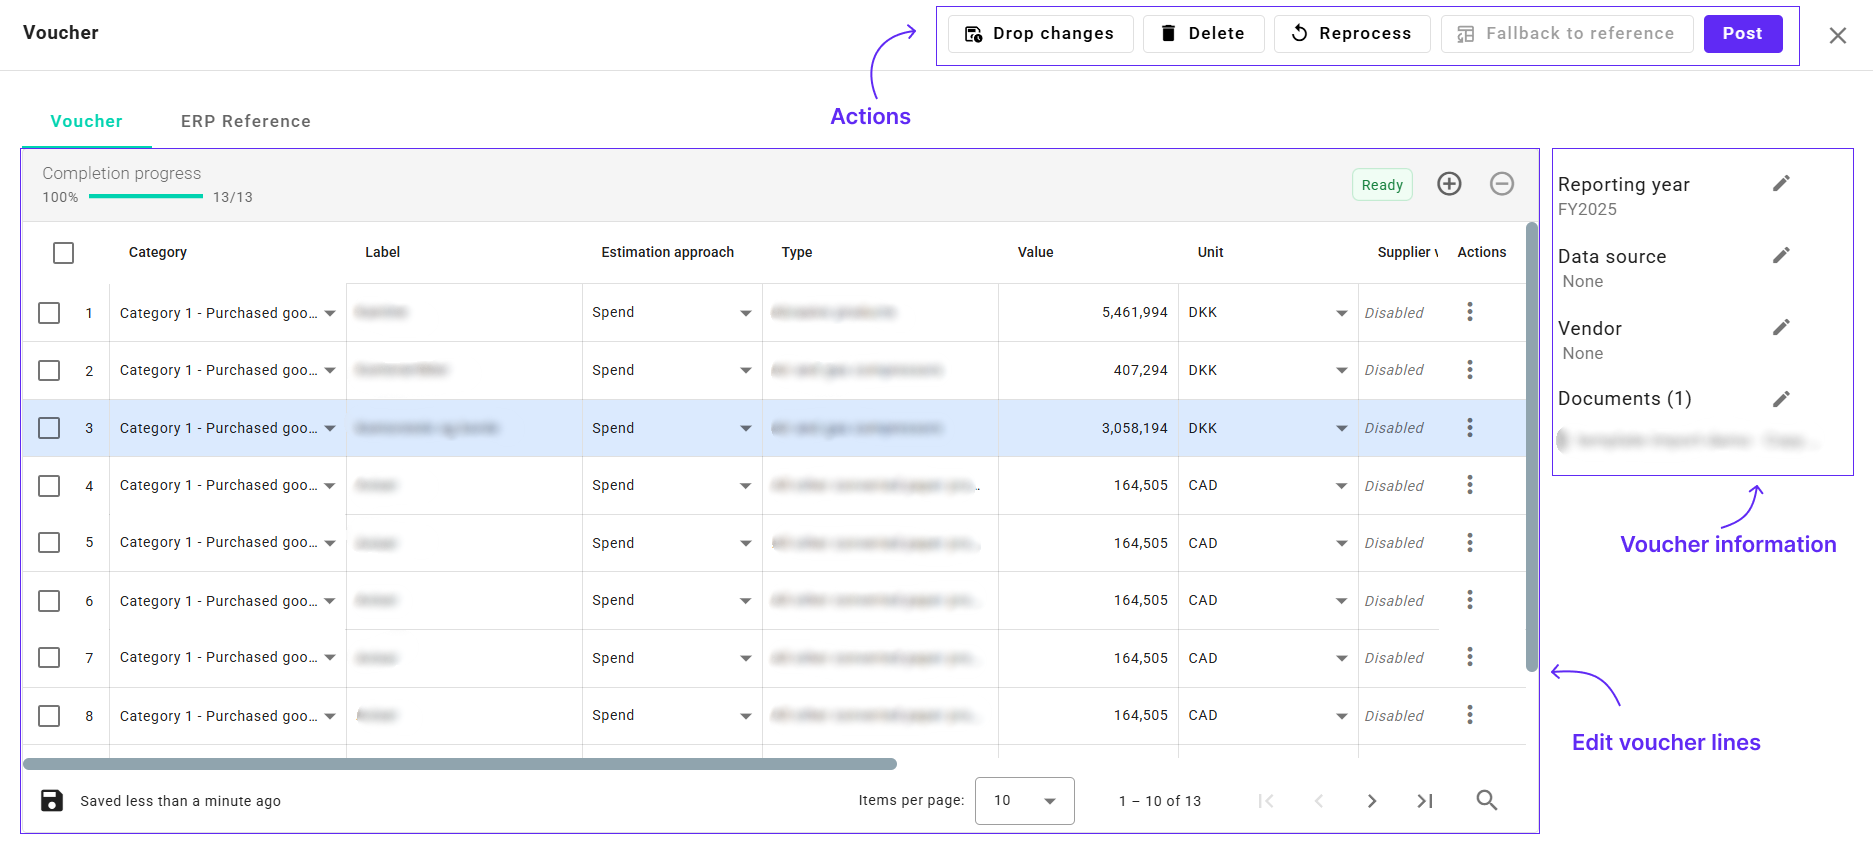
Vouchers in BeWo's platform are collections of lines often related to a document, such as an invoice or receipt. Each voucher can contain one or more lines of data. This guide will walk you through the process of adding new vouchers and editing existing ones in a user-friendly way.

The Add/Edit Voucher view allows you to input multiple lines of data.
Getting Started
To begin adding a new voucher:
-
Navigate to the Desired Category:
- Use the Input Guide to select the category you want to input data for (e.g., Purchased Electricity, Business Travel).
-
Create a New Voucher:
- Click on the "New Voucher" button.
- A new voucher form will open, automatically including an empty line for you to start with.
Input Flow for a Line
Each line in a voucher represents a specific data entry. Here's how to fill out a line:
1. Select a Category
-
By default, the category you selected in the Input Guide is pre-selected.
-
Switch Categories: You can add data from multiple categories by changing the filters.
Select or change the category for the line.
2. Select Organization
-
If you have only one organization, it will be selected by default.
-
Multiple Organizations: Choose the appropriate organization from the dropdown if you have more than one.
Choose the organization the data belongs to.
3. Select Estimation Approach
-
Estimation Approaches:
- Supplier
- Activity
- Spend
-
Selecting an estimation approach narrows down the type of data you will input.
Choose how the emissions will be estimated.
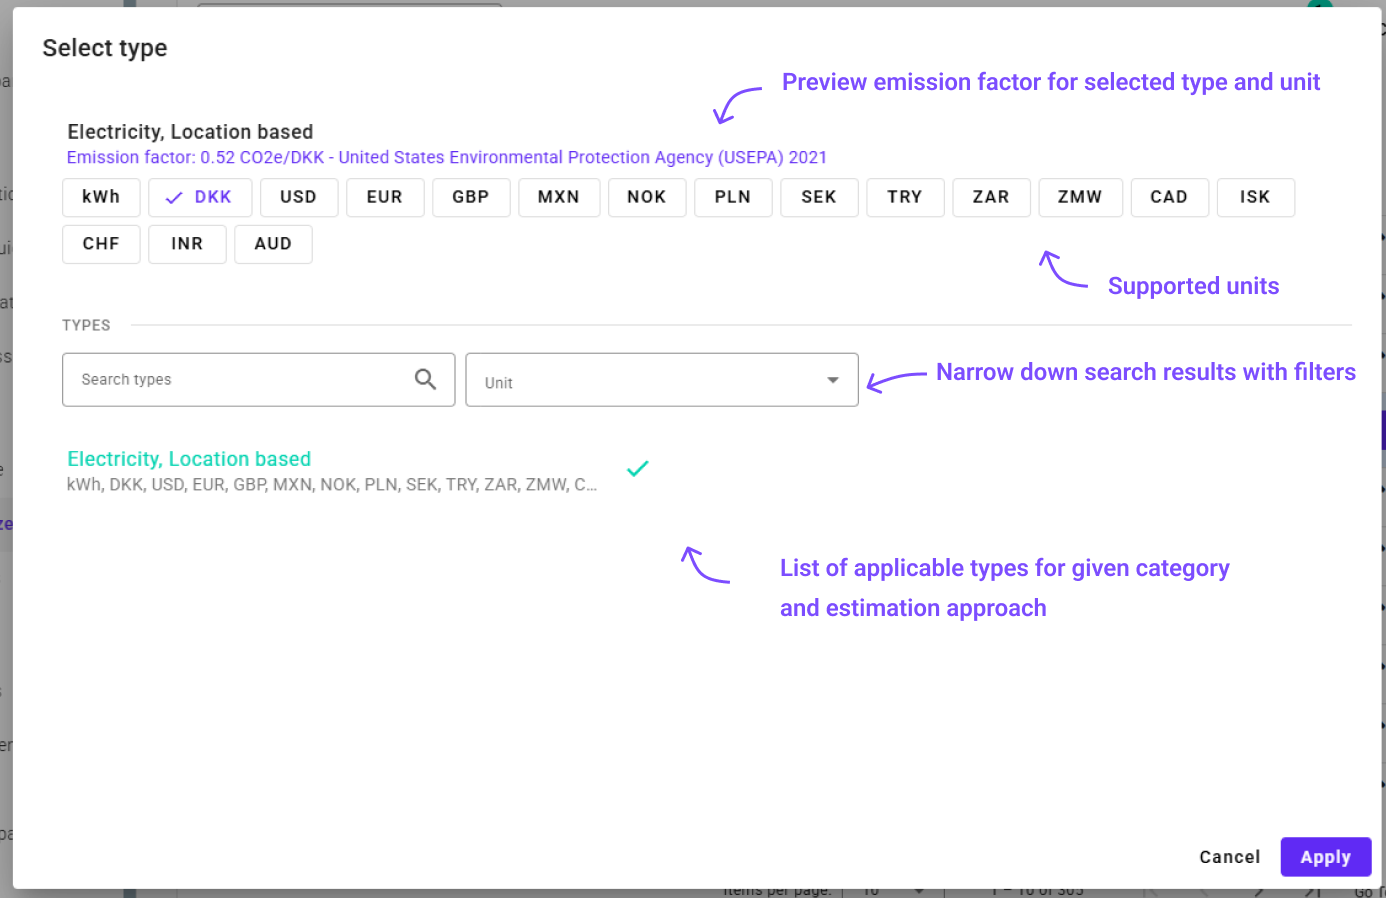
4. Select a Type
-
Based on the Category and Estimation Approach, the platform will display available types.
-
Example: If you select Activity for Purchased Electricity, types like Electricity, Location based may appear. You can choose to select unit from the list of supported units. Selecting unit and type allows you to preview additional information for emission factor and database used for calculations.

Select the specific type of data you're inputting.
5. Add a Descriptive Label
-
Provide a clear description for your data.
-
Example: "Electricity Usage - Location A - January 2024"
Enter a descriptive label for easy identification.
6. Add Value & Unit
-
Value: Enter the numerical value of your data.
-
Unit:
-
If Activity estimation approach is selected, units like kWh, kg, liters are available.
-
If Spend estimation approach is selected, units like DKK, EUR, USD are available.
-
Input the value and select the appropriate unit.
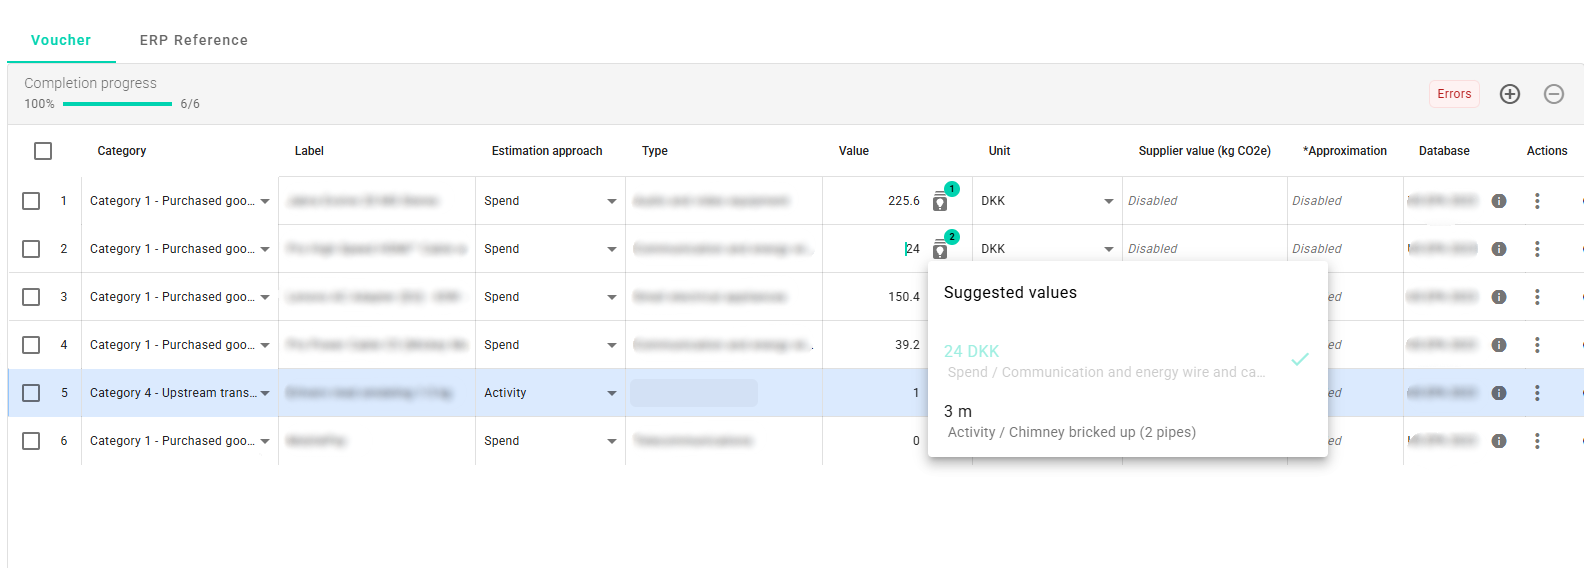
In some cases, an alternative value and unit are available. You can select value from the list of available value sets. A value set consists of a value, a unit, an estimation approach, and in some cases, a type. Selecting a value set from the list will update the mentioned fields. Note that the type field is not always identified by the AI, thus it may be required to be correctly specified by the user.

Alternative value sets.
7. Specify a Time Period
-
By default, the line is set to your current reporting year.
-
Custom Period: You can specify a more precise start and end date if needed.
Set the period that the data covers.
Example of a Completed Line

An example of a line filled out with all necessary information.
Adding Voucher Information
After entering all lines:
Attach Documents
-
Upload Attachment: Click on the "Attach Document" button to upload related documents (e.g., invoices, receipts).
-
Click the pencil icon to edit the line.
-
Upload the document

-
-
No Attachments: If you don't have any documents, tick the box "I don't have attachments".
Indicate if you have no documents to attach.
- Note: Even if you don't have attachments, the platform keeps this reference in case you want to verify the data points later.
Finalizing Your Voucher
Once you've entered all your data and attached any necessary documents:
Post
-
Post Data: Click "Post" to submit the data to the Data Pipeline for processing.
-
Saving changes: Changes applied to the voucher are saved automatically.
Understanding Errors
The platform continuously validates your input to ensure it's valid for reporting purposes. If there are issues, error messages will appear, prompting you to fix them.
Common Errors and How to Fix Them
Example Error: No Documents Attached
-
Error Message: "No documents have been attached."
-
Resolution:
- Option 1: Upload the required document(s).
- Option 2: Tick the "I don't have attachments" checkbox if you don't have any documents.
Other Validation Errors
- Missing Required Fields: Ensure all mandatory fields are filled out.
- Invalid Values: Check that numerical values are entered correctly and units are appropriate.
- Date Issues: Verify that the time period dates are valid and within the reporting year.
Tips for Resolving Errors
- Review Input Carefully: Double-check all entered information.
- Follow On-Screen Prompts: The platform provides guidance on what needs to be fixed.
- Seek Help if Needed: If you're unsure how to resolve an error, contact support.
Removing Document Requirements
If you prefer not to require documents for vouchers:
-
Admin Panel: You can remove the requirement for documents on all vouchers in the Admin Panel.
noteThis setting affects all vouchers and should be used according to your organization's policies.
Editing Existing Vouchers
To edit an existing voucher:
-
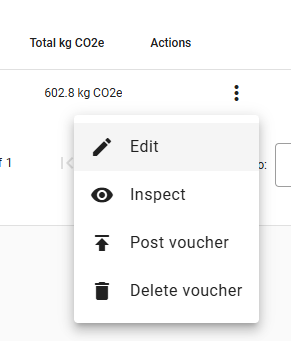
Locate the Voucher (starting in the input guide): Find the voucher you want to edit in the list of active vouchers.
-
Open the Voucher: Click on the voucher to open it in the edit view.

-
Make Changes: Modify any lines, add new ones, or update voucher information as needed.
-
Save Changes: After editing, Post or Save and Close the voucher.
Additional Resources
-
Understanding Estimation Approaches: Learn more about the different estimation methods.
👉 Read More: Estimation Approaches Explained
-
Data Validation Rules: Familiarize yourself with the platform's validation rules to prevent errors.
👉 Read More: Data Validation Rules
Need Help?
If you have any questions or need assistance with adding or editing vouchers, our support team is here to help.
👉 Contact Support: Support Page
By following this guide, you can efficiently add and edit vouchers in BeWo's platform, ensuring your CO2e emissions data is accurate and ready for reporting.