Importing Documents
The Importing Documents feature in BeWo's platform allows you to upload various file types and seamlessly integrate their data into your CO₂ emissions calculations. Whether you have invoices in PDF format or data in Excel spreadsheets, the platform provides a guided flow to help you import your documents efficiently.
Importing Functionality Overview
The importing process is designed to be user-friendly and consists of guided steps that vary slightly depending on the type of file you are uploading.
General Import Flow
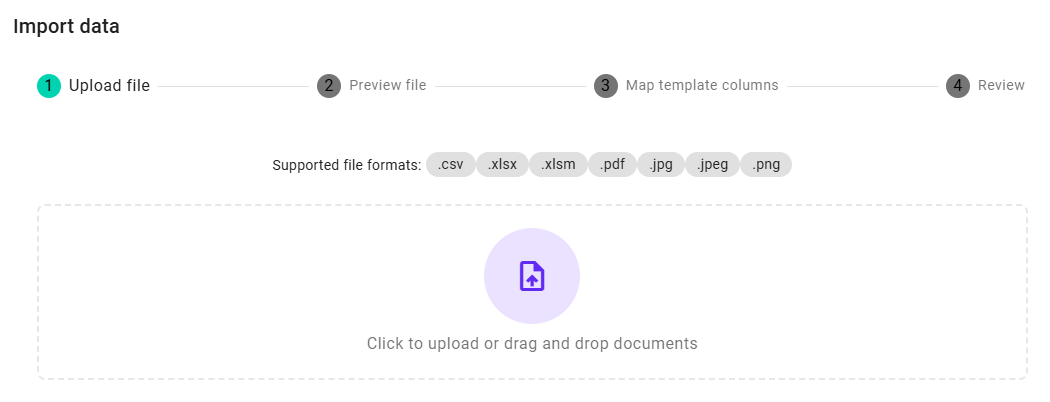
- Upload File: Begin by selecting the file you wish to import.
- File Processing: The platform processes the file based on its format.
- Finish Import: Complete the import process and review the imported data.

An overview of the importing documents feature.
Importing PDFs and Images
When you upload PDFs or image files, the platform utilizes AI technology to extract relevant data from documents like invoices and receipts.
Steps for PDFs and Images
-
Upload File
-
Click on the "Import" button in the category you are working on.
-
Drag and drop your PDF or image files into the upload area or click to browse your computer.

-
-
File Classification by AI
-
The system will automatically process the files using AI to extract data such as values, units, vendors, and dates.

-
This may take a few moments depending on the file size.
-
-
Finish Import
-
Once processing is complete, you'll see a confirmation screen.
-
Click "Complete" to complete the import.
-
-
Review and Edit
-
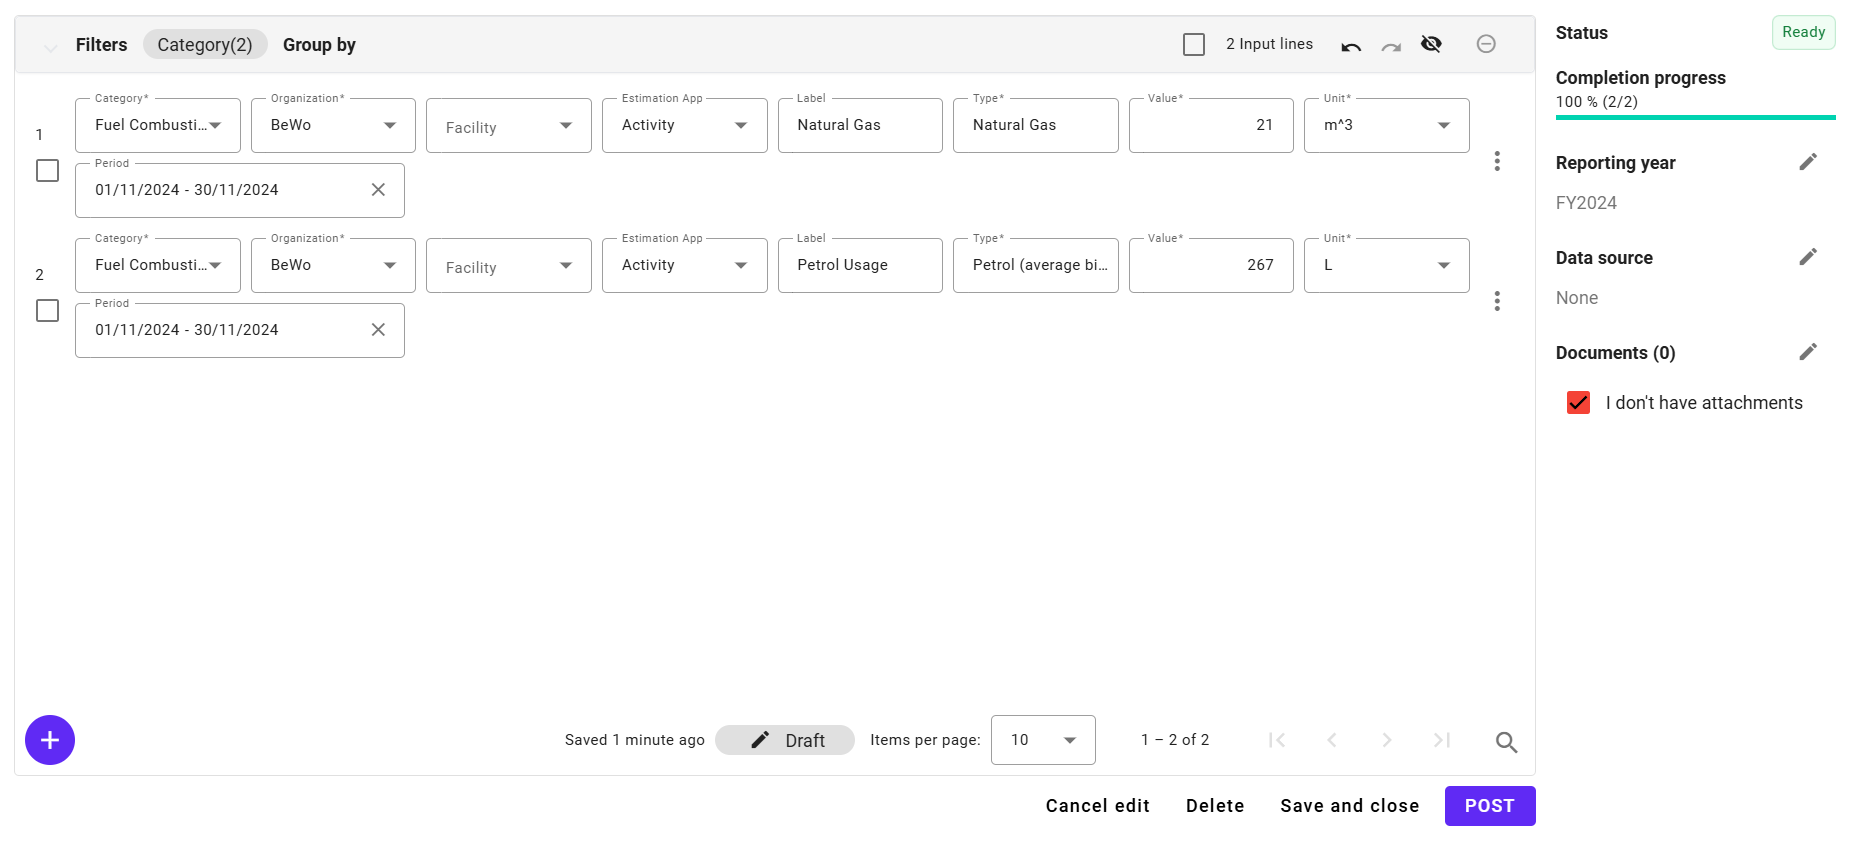
After importing, you can open the Edit Voucher view to review and make any necessary changes to the extracted data.
👉 Learn more: Adding and Editing Vouchers
-
Importing Excel and CSV Files
For Excel (.xlsx) and CSV (.csv) files, the platform provides a mapping interface to align your data columns with the platform's fields.
Steps for Excel and CSV Files
-
Upload File
-
Click on the "Import" button in the category you are working on.
-
Drag and drop your Excel or CSV file into the upload area or click to browse your computer.

-
-
Preview File
-
The platform will display a preview of your file's data.

-
This allows you to verify that you've selected the correct file and that the data appears as expected.
-
-
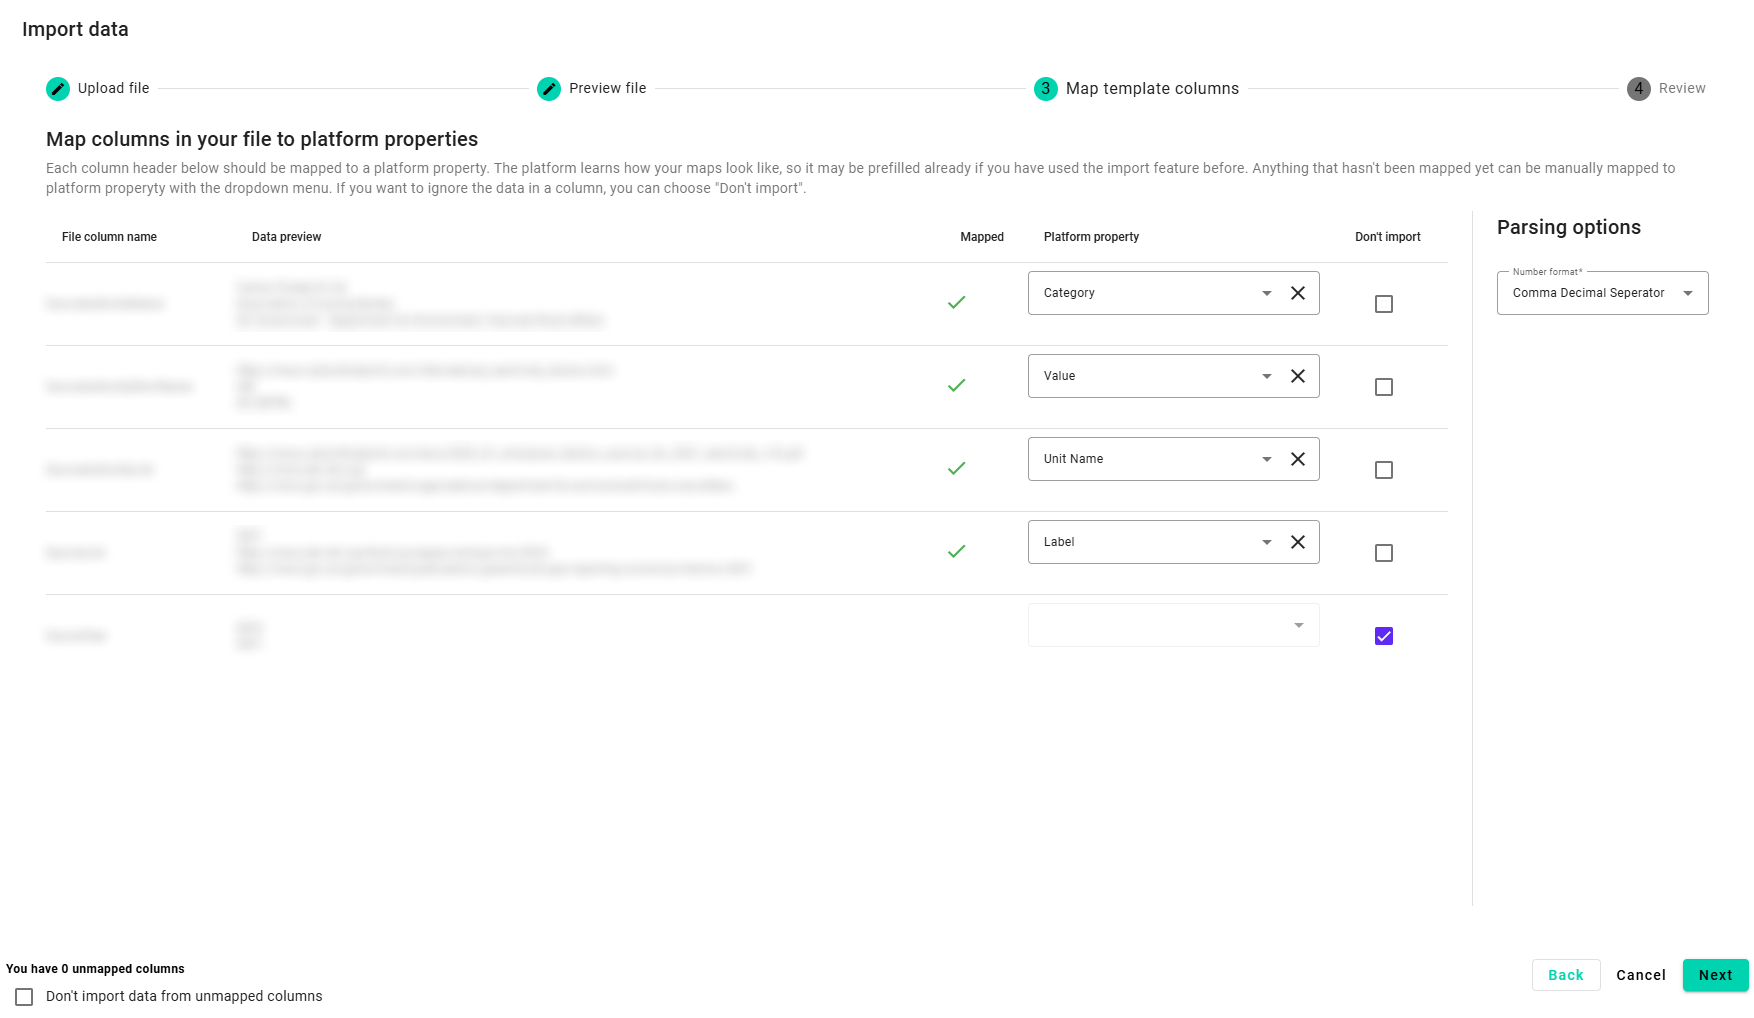
Map Template Columns
-
You'll be prompted to map the columns in your file to the platform's data fields.

-
Mapping Fields: Match your file's columns to fields like Type, Category, Value, Unit, Vendor, Date, etc.
- Example:
- Your Column: "Electricity Usage" → Platform Field: "Value"
- Your Column: "Usage Date" → Platform Field: "Start Date"
- Example:
-
Recommended Fields: We recommend that you include key fields in your import (e.g., Value, Unit, Label).
-
-
Review
-
After mapping, review the data to ensure everything is correctly aligned.
-
The platform may highlight any rows with errors or missing information.
-
Validation Checks: The system will check for proper structure and required fields.
- Note: The Excel file must have only one sheet and be structured in a table format.
-
-
Finish Import
-
Once you are satisfied with the mapping and the data review, click "Complete" to complete the import process.
-
-
Review and Edit
-
After importing, you can open the Edit Voucher view to make any necessary adjustments.
👉 Learn more: Adding and Editing Vouchers
-
After Importing: Editing Vouchers
Regardless of the file type, after importing your documents, you have the opportunity to review and edit the imported data.
-
Edit Voucher View: Allows you to:
- Modify data entries.
- Add or remove lines.
- Correct any errors identified during import.

-
Accessing the Edit Voucher View:
- After importing, you'll be prompted to open the voucher.
- Alternatively, you can find the voucher in the list of active vouchers and click "Edit".
-
👉 Learn more: Adding and Editing Vouchers
Tips for Importing Excel and CSV Files
-
File Structure:
- Ensure your Excel file has only one sheet.
- Data should be organized in a table format with clear headers.
-
Column Headers:
- Use clear and consistent column headers to simplify the mapping process.
- Headers should correspond to the data they represent (e.g., "Value", "Unit", "Date").
-
Data Validation:
- Before importing, check your file for any missing values or inconsistencies.
- Make sure that required fields are filled out.
Handling Import Errors
If the platform detects issues during import:
-
Error Messages:
- The system will provide error messages indicating the problem (e.g., missing required fields, invalid data types).
-
Correcting Errors:
- You can go back to your original file, correct the errors, and re-import.
- Alternatively, proceed with the import and fix errors in the Edit Voucher view.
Benefits of Importing Documents
-
Efficiency:
- Importing allows you to add large amounts of data quickly.
-
Accuracy:
- Reduces manual data entry errors by extracting data directly from documents.
-
Flexibility:
- Supports multiple file formats to accommodate different data sources.
Next Steps
Now that you know how to import documents:
-
Start Importing: Upload your documents to add data to the platform.
-
Review Data: Use the Edit Voucher view to ensure your data is accurate.
-
Continue Learning:
- 👉 Learn more about: Adding and Editing Vouchers
- 👉 Understand: Data Validation Rules
Need Help?
If you have any questions or need assistance with importing documents, our support team is here to help.
👉 Contact Support: Support Page
By utilizing the importing documents feature, you can efficiently add important data to BeWo's platform, ensuring your CO₂ emissions reporting is comprehensive and accurate.