Reviewing Data
The Data Optimizer is a powerful tool that helps you enhance and review your data before reporting your CO2e emissions. This article provides clear directions on how to navigate the review process, understand the difference between unreviewed and reviewed data, and perform key actions like marking lines as reviewed, editing data, and deleting irrelevant lines.
Working Across Time
In the Data Optimizer, you work across time, meaning you can see data from multiple reporting years at once. Although you're always working at the calculation line level, you can still open a voucher to see the related lines.
Understanding Unreviewed vs. Reviewed Data
By default, all data processed in the Data Pipeline is unreviewed. When you mark lines as reviewed, they enter a reviewed state and are not displayed in the default filters. The Data Optimizer does this to focus on lines that are not yet reviewed, effectively hiding reviewed lines from the default view.
- Tip: If you want to see data from a specific year, you can apply a filter to your search.
Reviewing Data Workflow
We recommend starting your review process by focusing on the most impactful results first:
-
Check the Results of Your Largest Vendors
- Identify vendors contributing the most to your emissions.
- Prioritize reviewing their data for accuracy.
-
Check the Results of Your Largest Types
- Review the emission types with the highest CO2e values.
- Ensure they are correctly classified and calculated.
-
Check for Frequently Occurring Lines
- Look for lines that appear often in your data.
- Verify that recurring entries are accurate.
-
Check the Overall Largest Results Using Sort Options
- Use sorting features to identify lines with the highest impact.
- Focus on lines with the largest Value or kg CO2e.
Tip: Finding the Most Impactful Lines
- Sort Data: You can sort on fields like Value or kg CO2e to view lines that have a large impact on the results.
- Example: Sorting by the highest kg CO2e value helps you identify lines contributing most to your emissions.
Monitor Your Review Progress
- Keep an eye on your Review Progress indicator in the top right corner of the Data Optimizer.
- The Trust Score increases as you review more lines and CO2e emissions.
Actions During the Reviewing Process
During the review process, you will generally perform three key actions:
- Accepting Results by Marking Them as Reviewed
- Editing Data: Assigning new categories or types, or moving data to other organizations and facilities.
- Deleting Data: Removing lines that shouldn't be included in your emissions reporting.
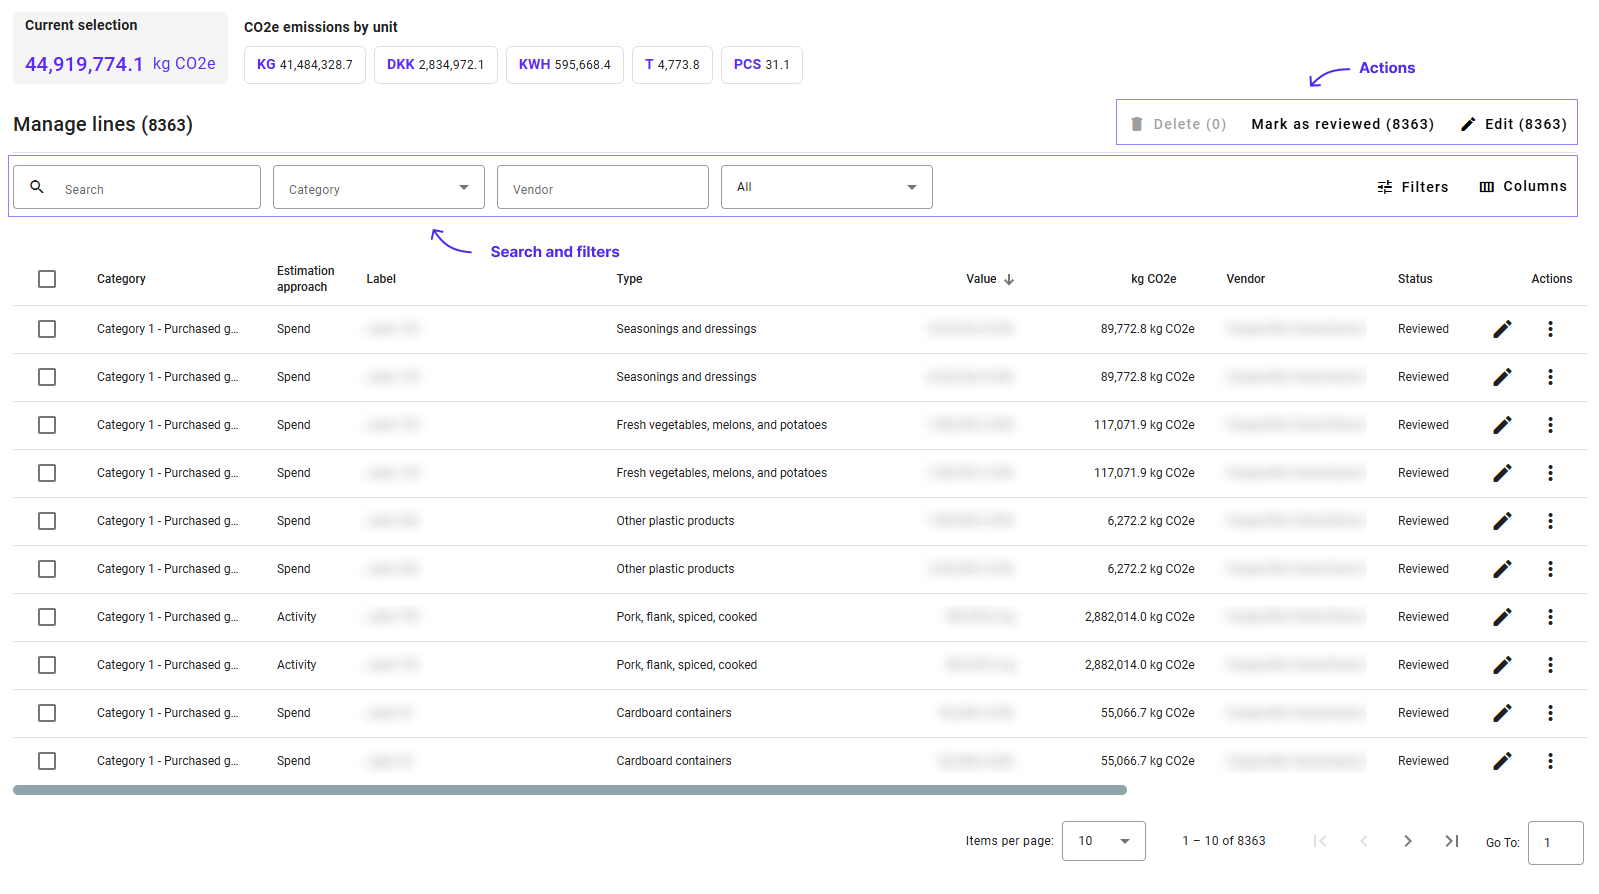
- Finding Data: Apply relevant filters (e.g., vendors, types) or search by label or vendor to locate specific lines.
- More Filters: Additional filtering options are available. Refer to the Searching for Data article for more information.
Marking Lines as Reviewed
Marking lines as reviewed indicates that you've accepted the results and no further action is needed for those lines.
How to Mark Lines as Reviewed
-
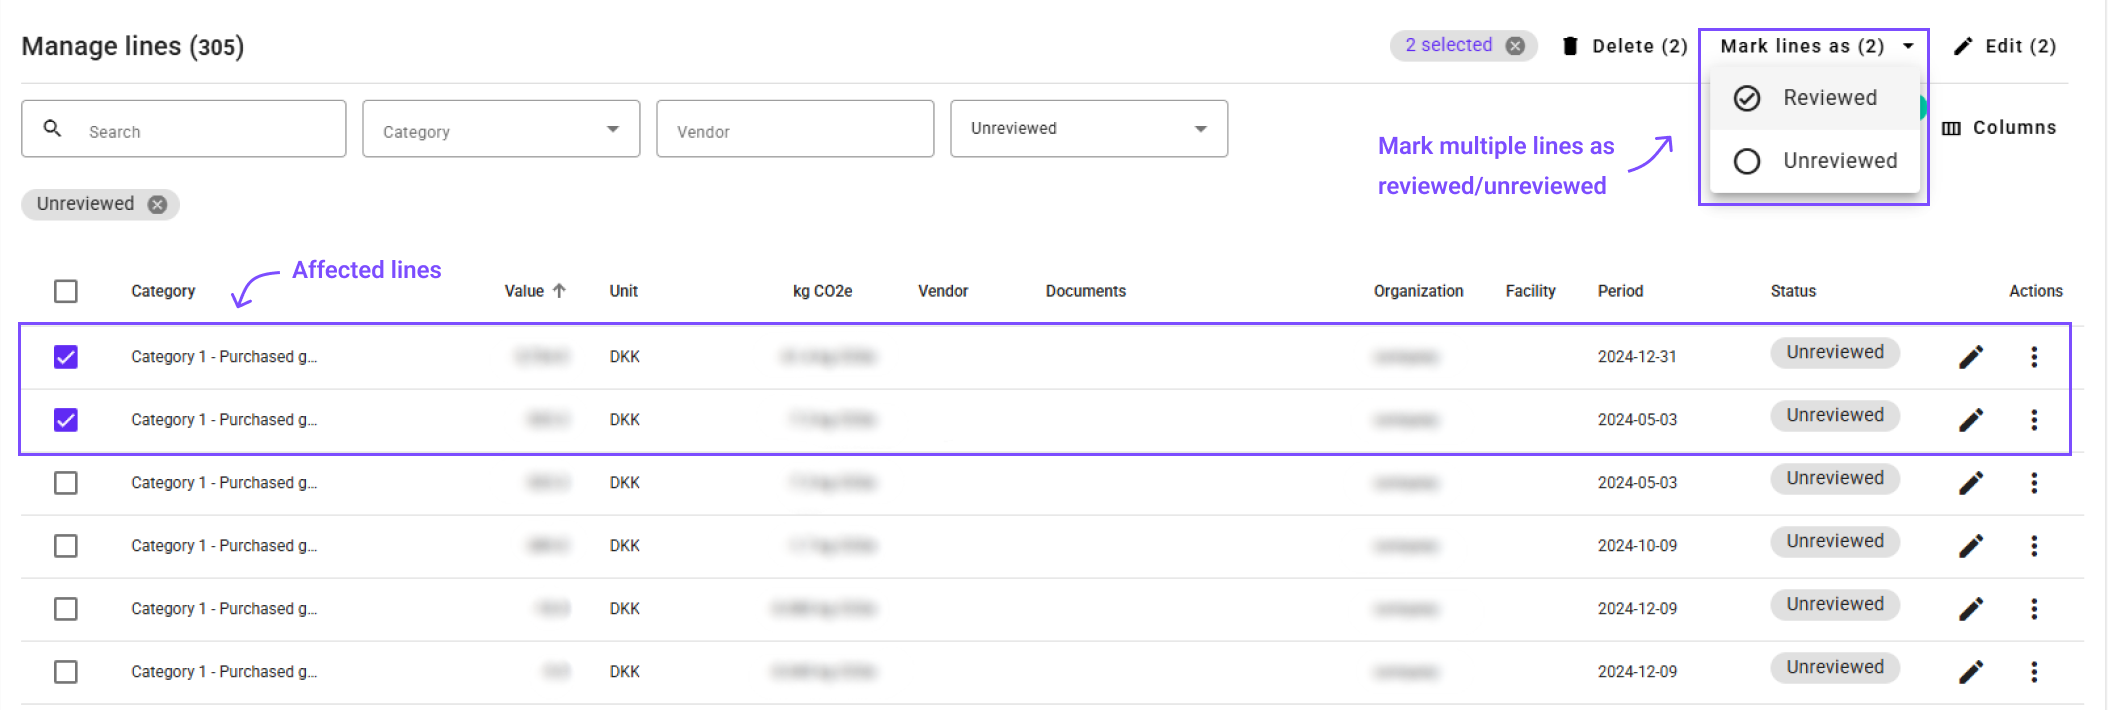
Select multiple Lines to mark as Reviewed:
- Apply Filters: Use filters to narrow down the lines you want to mark as reviewed.
- Select Individual Lines: Use the checkbox on the left of each line to select specific lines.
-
Click "Mark lines as Reviewed":

- From the dropdown you can choose to mark selected lines as Reviewed or Unreviewed.
-
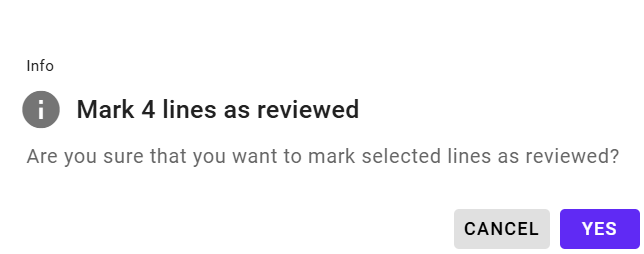
Confirm the Action:
- A dialog box will appear.
- Click Yes to confirm and mark the selected lines as reviewed.

You can choose to mark a single line as Reviewed or Unreviewed by clicking on the Review Status badge.

Editing Data
Editing data allows you to correct or update lines by assigning new categories, types, or moving data to other organizations and facilities.
How to Edit Data
-
Select Lines to Edit:
- Apply Filters: Focus on lines you want to edit (e.g., all lines from a specific vendor).
- Select Individual Lines: Use the checkbox on the left to choose specific lines.

-
Click the "Edit" Button:
-
Use the Edit Panel:
- The edit panel will open, allowing you to make changes.
- Assign New Category and Type: Select the appropriate options from the dropdown menus.
-
Validation of Changes:
- The system will validate your changes to ensure they are acceptable from a carbon accounting perspective.
-
Validation Indicators:
- A green checkmark indicates valid changes.
- A red warning indicates invalid changes.
-
Apply Changes:
- Once your changes are validated, click the Apply button to save them.
Validating Edits
-
Purpose: Ensure that edits comply with carbon accounting standards.
-
Common Validation Checks:
- Compatibility of the selected type with the category.
- Appropriate unit measurements for the type of emission.
-
Invalid Edit Example:
- Assigning Flight Emissions to Scope 2 Purchased Electricity is invalid.
Tips for Handling Invalid Edits
-
Narrow Your Edits: Apply changes to a smaller, more specific group of lines.
-
Check Units: Ensure that the units of the lines match the requirements of the new type.
-
Edit Individually: If bulk edits fail, consider editing lines individually.
-
Learn More: For a detailed explanation, refer to the Making Changes article.
Deleting Lines
Deleting lines removes data that is not relevant for your carbon accounting, helping to maintain accurate emissions reporting.
How to Delete Lines
-
Select Lines to Delete:
- Select Lines: Use the checkbox on the left to select specific lines. You can also select all the lines for a page if you use the checkbox in the header row.
-
Click the "Delete" Button:
-
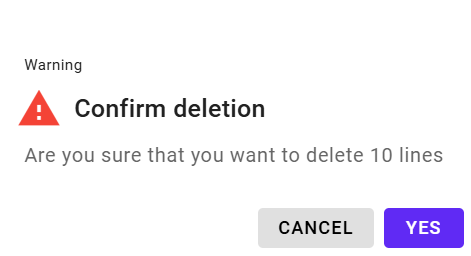
Confirm Deletion:
- A dialog box will appear.
- Click Yes to confirm and delete the selected lines.

When to Delete Lines
- Irrelevant Data: Remove lines that do not contribute to your carbon footprint.
- Data Errors: Delete lines that are incorrect and cannot be fixed through editing.
Tips for Effective Reviewing
- Use Filters Strategically: Apply filters to focus on specific vendors, types, or reporting years.
- Sort Data: Utilize sorting options to bring the most impactful lines to the top.
- Review Frequently: Regularly monitor your data to keep your emissions reporting accurate and up-to-date.
Next Steps
Now that you're familiar with the reviewing process, you can proceed to:
- 👉 Continue to: Making Changes
- 👉 Learn about: Fixing Errors
- 👉 Explore: Searching for Data
Need Help?
If you have any questions or need assistance during the reviewing process, our support team is here to help.
👉 Contact Support: Support Page
By following this guide, you'll be able to effectively review and manage your data, ensuring that your CO2e emissions reporting is accurate, consistent, and aligned with your organization's sustainability goals.