Editing Data
In the process of reviewing your data, you may find the need to make changes to ensure accuracy and alignment with your carbon accounting practices. BeWo's Data Optimizer offers several ways to edit your data, each suited to different scenarios. This article provides an in-depth explanation of the different options available for editing your data.
Overview of Editing Approaches
There are three primary methods for editing data in the Data Optimizer:
- Bulk Editing Lines via Filter
- Single Line Changes
- Editing the Whole Voucher
Each approach has its benefits and is effective in tackling different issues. Understanding when and how to use each method will streamline your data correction process.
Bulk Editing Lines
Bulk editing allows you to change multiple lines at once. This method is ideal when you need to:
- Change the Type, Category, Organization, or Facility for a group of lines.
- Move data to a specific category or type due to reclassification or to fix AI misclassifications.
- Efficiently update data based on shared attributes like vendor, product, or specific phrases.
When to Use Bulk Editing
- Specific Classification: You want to apply a more specific classification to a group of lines.
- Correcting AI Mistakes: The AI assigned an incorrect type or category to multiple lines.
- Scope Adjustments: You need to move lines from one scope to another (e.g., from Scope 1 to Scope 3).
How to Perform Bulk Editing
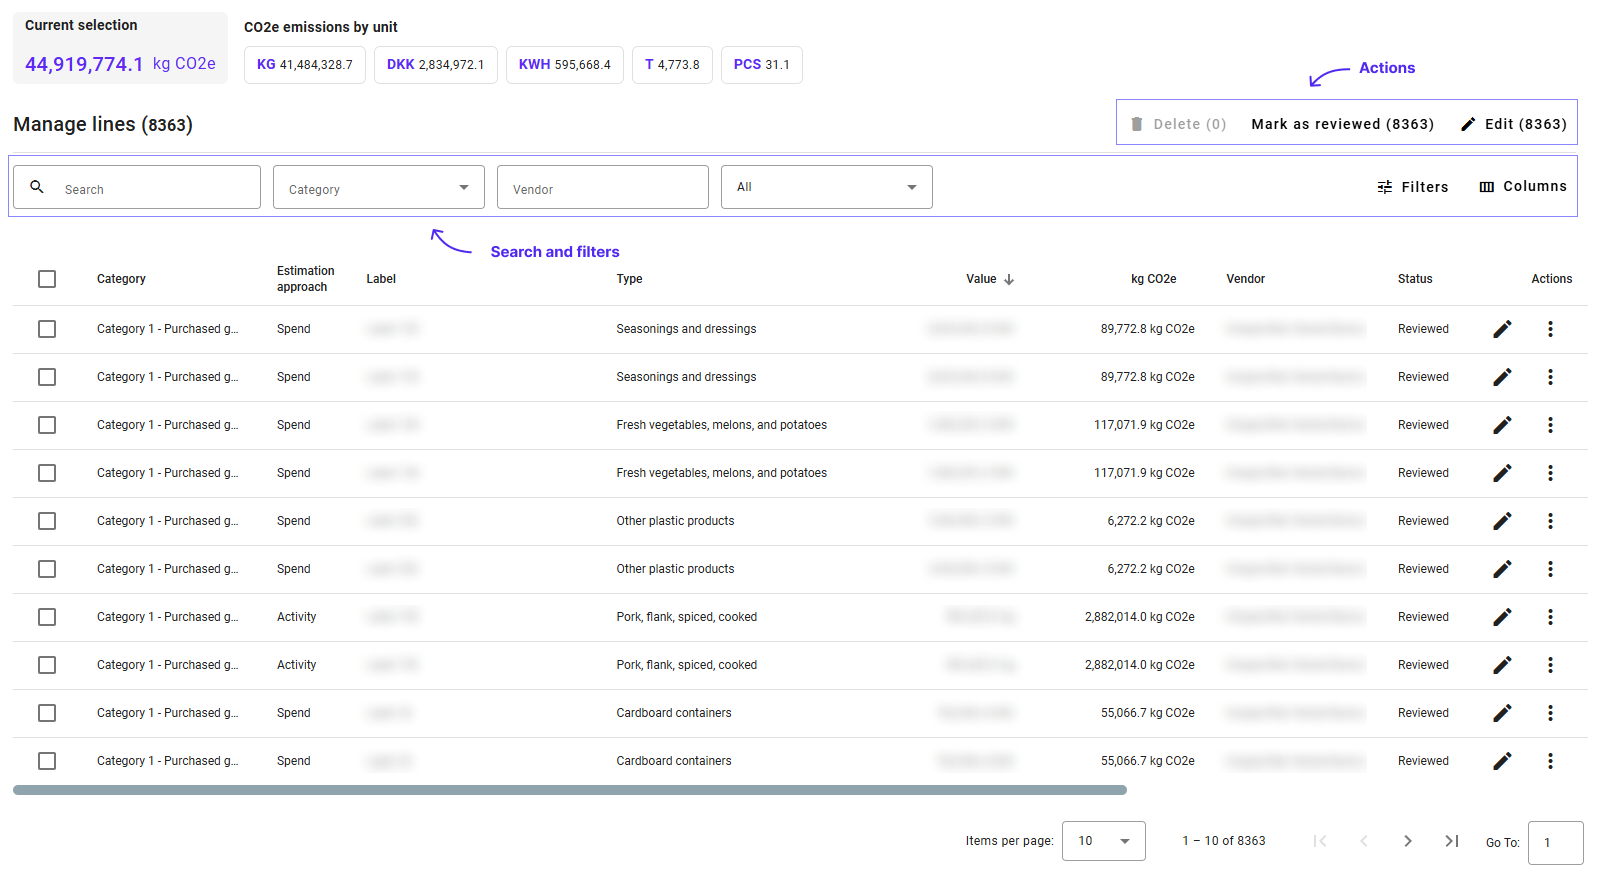
Bulk editing is done via the Data Optimizer and follows similar steps to the reviewing process.
Steps:
-
Set Your Filter:
- Apply filters to narrow down the lines you want to edit.
- Filters can include Search, Vendor, Type, Organization, and more.

-
Start the Bulk Edit:
- Click the Edit button located above the lines table.
-
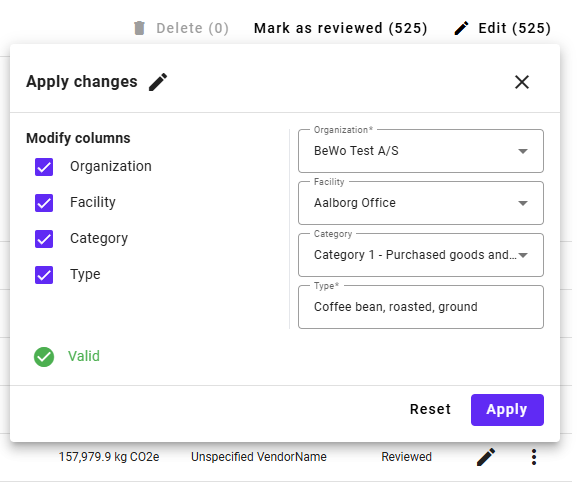
Apply the Edit:
- In the edit panel, assign the new values you want to apply, such as a new Type or Category.

-
Validation:
-
The system will validate your changes to ensure they are acceptable from a carbon accounting perspective.
- A green checkmark indicates the edit is valid.
- A red warning icon indicates an issue with the edit.
-
-
Apply Changes:
- Once validated, click the Apply Changes button to execute the bulk edit.
Single Line Changes
Single line editing is useful for making precise corrections to individual lines. This method is ideal when:
- You need to change details specific to one line.
- Adjusting the Value, Unit, or Label for greater specificity.
- Correcting data where the AI couldn't read or interpret the information accurately.
When to Use Single Line Editing
- Detailed Corrections: Minor adjustments that only apply to one line.
- Data Entry Errors: Fixing typos or incorrect values.
- Additional Information: Adding details from documents not captured by the AI.
How to Edit a Single Line
Steps:
-
Enter Edit Mode:
- Click the Pencil Icon next to the line you want to edit.

-
Make Your Edits:
- The line will enter edit mode, allowing you to change fields such as Value, Unit, Label, Category, and Type.

- The system will validate your changes automatically.
-
Save Changes:
- Click the Save icon to apply your edits.
-
Cancel Changes:
- If you decide not to proceed, click the Cancel icon to discard your changes.
Recommendations
- Maintain Data Integrity: Avoid changing labels and values that originated from your ERP system unless necessary.
- Consistency: Ensure that changes align with the overall data structure to prevent discrepancies.
Editing the Whole Voucher
Editing an entire voucher allows you to make changes to all lines related to that voucher simultaneously. This approach is useful when:
- You want to view and edit a complete invoice with multiple lines.
- Making multiple manual edits to a single document, such as an invoice, receipt, or file.
When to Use Voucher Editing
- Comprehensive Changes: Adjustments that affect all lines within a voucher.
- Document-Level Edits: Corrections based on reviewing the entire document.
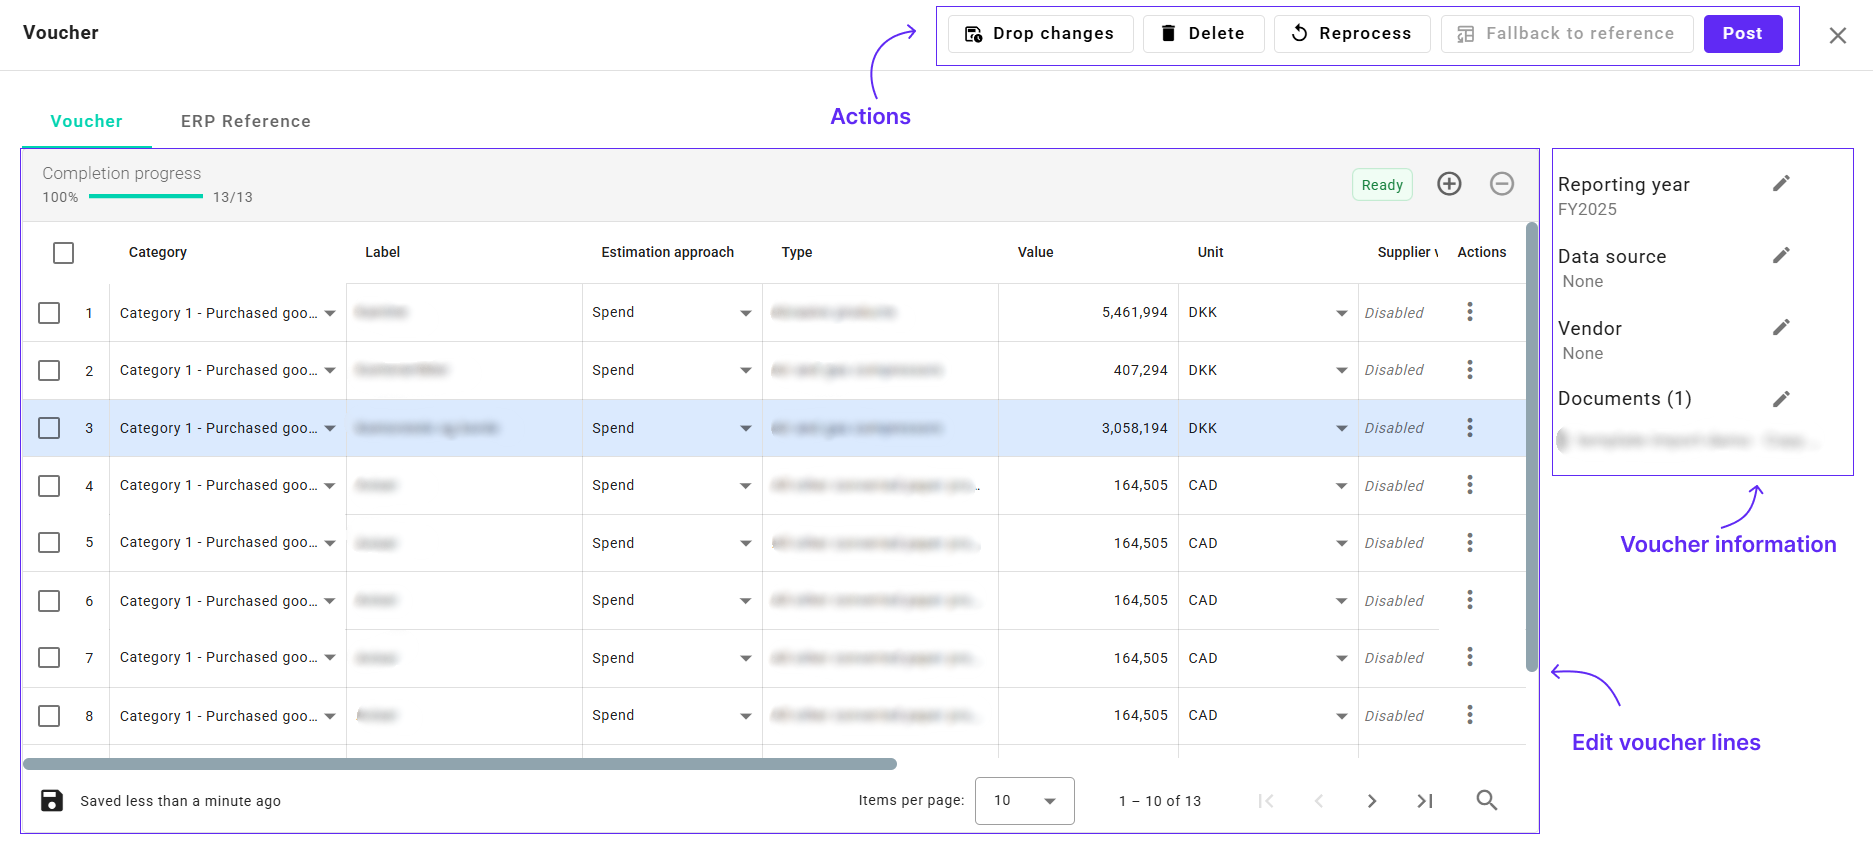
Voucher actions
- Drop changes Vouchers are automatically saved. Drop changes will revert all changes done since opening edit voucher dialog.
- Reprocess Voucher will be processed again. All edited changes will be lost.
- Post Mark voucher as posted. USe this action when your data has been reviewed and is ready for generating reports.
- Delete Deletes voucher.
- Fallback to reference Use ERP reference instead of processed results.
ERP Reference
If the voucher has been sourced from ERP integration, ERP Reference will be available in addition to processed lines. Here, you can preview and verify processed results in comparison with ERP source data.

How to Edit a Voucher
Steps:
-
Access the Voucher Menu:
- In the Lines Table, locate a line associated with the voucher you want to edit.
- Click the Three Dots Icon under the Actions column.

-
Select "Edit Voucher":
- From the dropdown menu, click Edit Voucher.
-
Make Your Changes:
- The Edit Voucher view will open, displaying all lines within the voucher.
- Make the necessary changes to each line as required.

-
Apply Changes:
- Use the action bar at the bottom to Save your changes.
- Close the voucher view when finished.
Additional Resources
- Input Guide: For a more comprehensive guide on using the Edit Voucher view, refer to the Input Guide on Editing Vouchers.
Recommendations
- Use for Multiple Edits: This method is ideal for making several changes within a single voucher.
- Document Reference: Ensure you have the associated document (invoice, receipt) for accurate editing.
Best Practices
- Validation is Key: Always ensure that your edits are validated by the system to maintain data integrity.
- Avoid Unnecessary Changes: Do not alter data from your ERP system unless correcting an error.
- Understand the Impact: Be aware of how changes affect your overall emissions calculations.
- Use Appropriate Method: Choose the editing approach that best suits the changes you need to make.
Next Steps
With an understanding of how to edit your data, you can proceed to:
- 👉 Continue to: Fixing Errors
- 👉 Learn about: Searching for Data
- 👉 Proceed to: Recommended Reviewing Actions
Need Help?
If you have any questions or need assistance with editing your data, our support team is here to help.
👉 Contact Support: Support Page
By effectively utilizing the editing features in BeWo's Data Optimizer, you ensure that your CO2e emissions reporting is accurate, reliable, and reflective of your organization's true environmental impact.