Fixing Errors and Warnings
During data processing, BeWo's AI may identify errors or warnings in your data that need your attention. This article explains how to locate these issues and provides steps to correct them, ensuring the integrity and accuracy of your CO2e emissions calculations.
Errors and warnings can also be fixed using the Data Optimizer. We recommend working on them there for a streamlined process.
👉 Learn more: Using the Data Optimizer
Understanding Errors and Warnings
- Errors: Critical issues that prevent data from being processed correctly. Examples include missing values, corrupted documents, or invalid data formats.
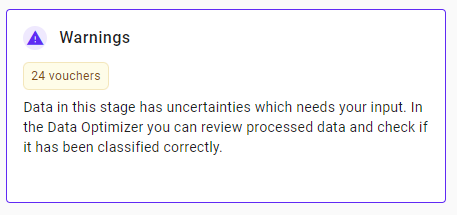
- Warnings: Potential issues that the AI is unsure about. These may require your review to confirm or adjust the data.
Voucher and Line Level Corrections
Errors and warnings can be fixed at both the voucher and line levels:
- Voucher Level: View/Edit whole vouchers. This is helpful for issues affecting the entire voucher, such as missing lines, vendor information or incorrect dates.
- Line Level: View/Edit individual lines that has a warning or error.
Steps for Correcting Errors
To ensure the integrity of your data, follow these steps to correct errors identified by the AI:
Step 1: Identify the Error
-
Navigate to Errors: Go to the Data Pipeline and click on the Errors stage to view all vouchers with processing issues.
This image shows how to access the Errors stage in the Data Pipeline.
Step 2: Edit the Voucher
-
Access Editing Options: Locate the voucher with the error and click on the Edit option, typically indicated by three dots or a pencil icon.
Click the edit icon to modify the voucher.
Step 3: Correct the Error
- Review Issues: In the editing interface, review the flagged issues highlighted by the system.
- Make Corrections: Update incorrect information, add missing details, or reassign categories as needed.
- Examples:
- Entering a missing value (e.g., quantity or unit price).
- Correcting a mislabeled category or type.
- Uploading a clearer version of a corrupted document.
- Examples:
For detailed instructions on editing a voucher, refer to the Editing Vouchers article.
Step 4: Saving Your Adjustments
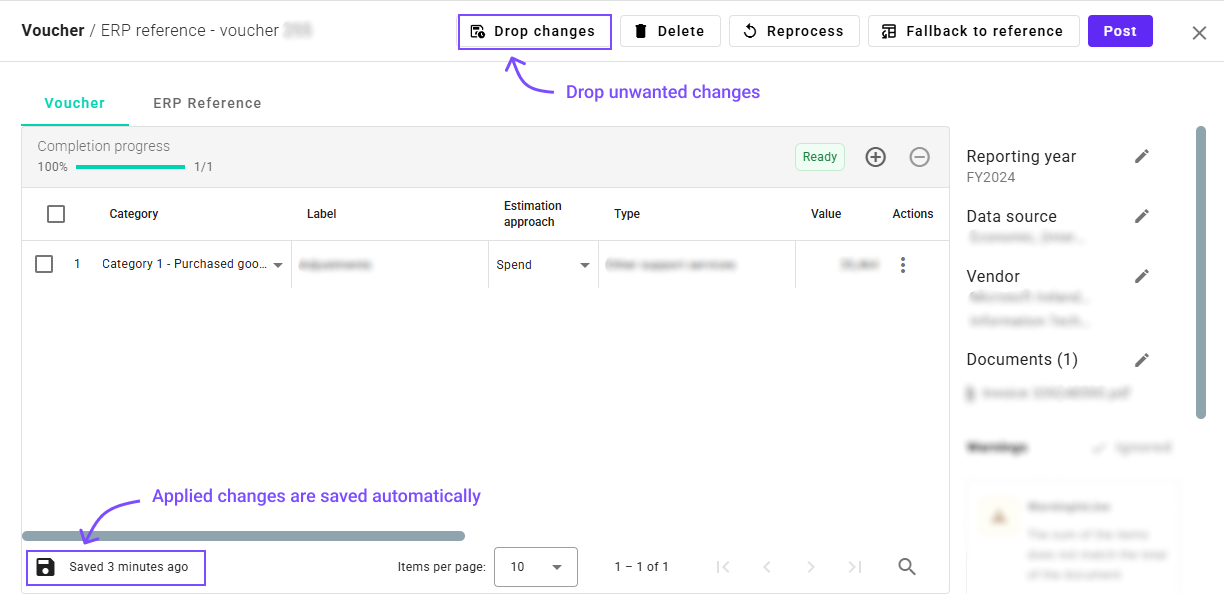
- Saving Changes: All corrections are saved automatically after opening edit voucher dialog. It is possible to drop all changes by clicking Drop changes button. This action will revert all changes made to the voucher after opening edit dialog.
- Automatic Progression: The system will automatically reprocess the voucher. If the issues are resolved, the voucher moves to the next stage in the Data Pipeline, progressing towards final submission.

Fixing Warnings
Warnings can be addressed similarly to errors:
- Navigate to Warnings: Go to the Warnings stage in the Data Pipeline.

- Review Warnings: Examine the AI's concerns, which may include uncertainties about data classification or missing optional information.
- Edit as Needed: Make any necessary adjustments to ensure data accuracy.
- Saving Changes: Changes applied to the voucher are saved automatically after opening edit dialog.
Accepting Warnings
Sometimes, the warnings flagged by the AI may already be correctly classified, and no further action is needed. In such cases, you can choose to accept these warnings and proceed to include them in your reports.
Posting All Warnings
-
Post All Warnings: In the Warnings stage, you can click on the Post All button to post all vouchers with warnings at once.
Clicking "Post All" allows you to accept and post all warnings in bulk.
Posting Individual Warnings
-
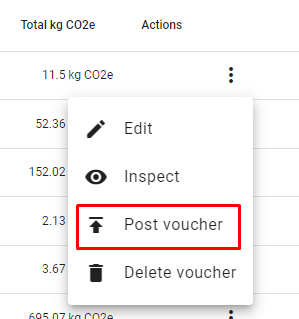
Post Individual Warning: For a specific voucher, click on the three dots icon or dropdown menu next to the voucher, and select Post to accept and post that individual warning.

Use the three dots menu to post individual warnings.
After posting, the data will begin the posting action in the background. You can monitor the progress by clicking the Refresh button. The vouchers and lines will move to the Posted stage, ready to be included in your reports.
👉 Learn more: Posting Data
Using the Data Optimizer
While you can fix errors and warnings directly in the Data Pipeline, the Data Optimizer offers a more streamlined and user-friendly interface for data correction.
- Benefits of Data Optimizer:
- Centralized view of all data issues.
- Advanced filtering and search capabilities.
- Guided suggestions for corrections.
👉 Learn more: Using the Data Optimizer
Best Practices
- Regularly Check for Issues: Monitor the Errors and Warnings stages to address issues promptly.
- Review AI Suggestions: The AI may offer recommendations for corrections; consider these when making adjustments.
- Accept Correct Warnings: If warnings are correctly classified, you can accept and post them to include the data in your reports.
- Ensure Data Completeness: Provide all necessary information to prevent errors from occurring.
Next Steps
After fixing errors and warnings, you can proceed to:
- 👉 Continue to: Posting Data
- 👉 Explore: Viewing Vouchers and Lines
- 👉 Begin Reporting: With clean data, you're ready to generate accurate CO2e emissions reports.
Need Help?
If you have any questions or need assistance with fixing errors and warnings, our support team is here to help.
👉 Contact Support: Support Page
By proactively addressing errors and warnings, and accepting correctly classified warnings, you ensure that your CO2e emissions calculations are accurate and compliant with reporting standards, supporting a trustworthy sustainability reporting process.