Integrating to Visma e-conomic
Configuring Visma e-conomic with BeWo enhances your sustainability reporting by automating data collection for emissions reporting. This guide provides detailed instructions on setting up the integration between BeWo and Visma e-conomic.
Initiating the Integration
To begin integrating e-conomic with your BeWo account:
- Navigate to Integrations: Select "Integrations" from the BeWo menu.
- Find e-conomic Integration in available integrations: Click on “Create new” in the e-conomic section.

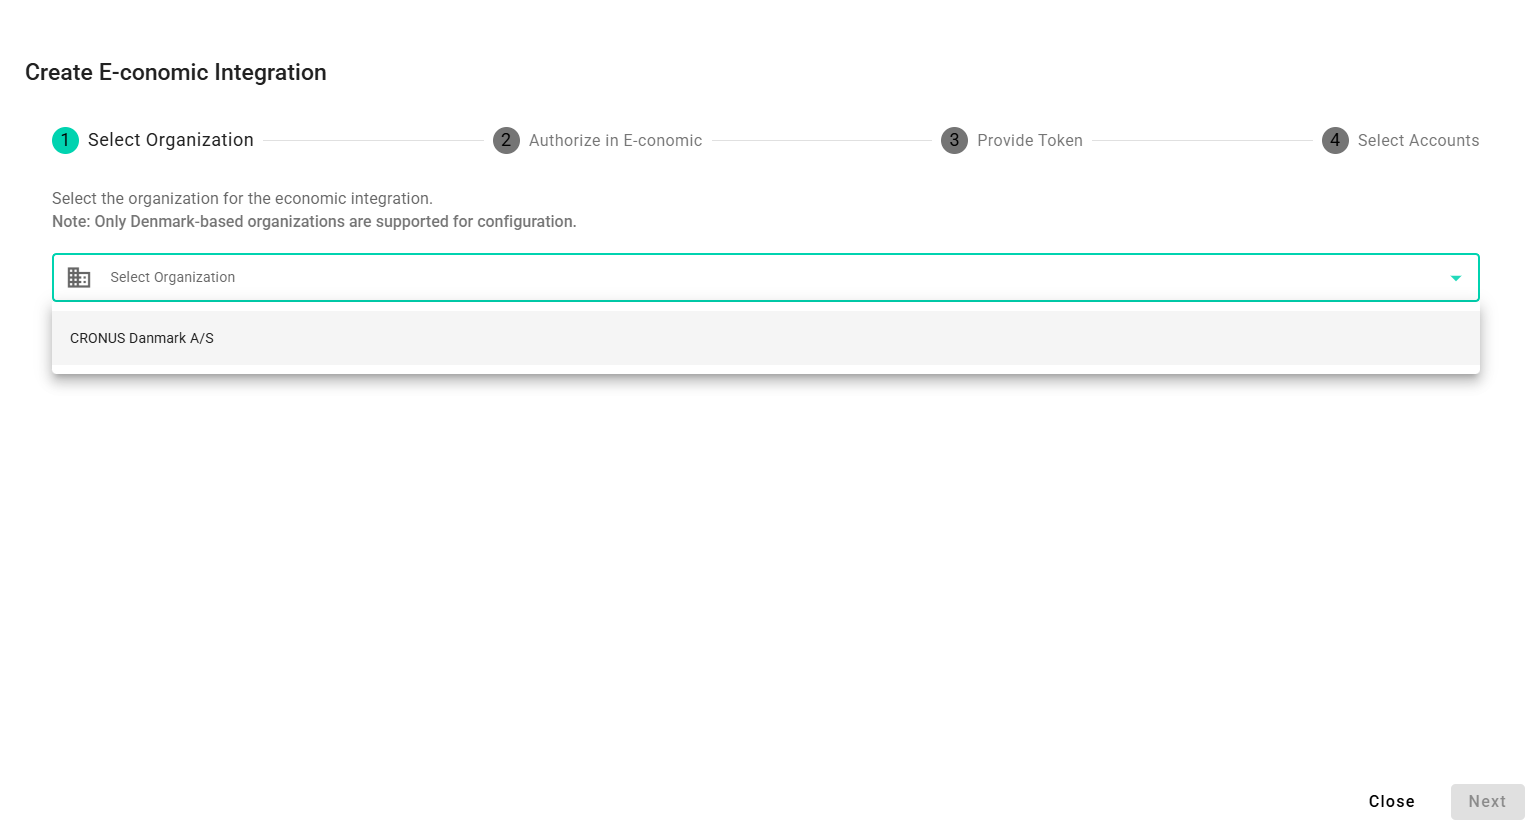
Step 1: Select organization
- Select organization from dropdown menu. You will not see this step if you have not created any organizations in the system yet. Instead, the system will create an organization based on the information retrieved from your e-conomic setup.
Authorization Process
Step 2: Authorize Access
- Click the purple “Authorize in e-conomic” button to initiate authorization.
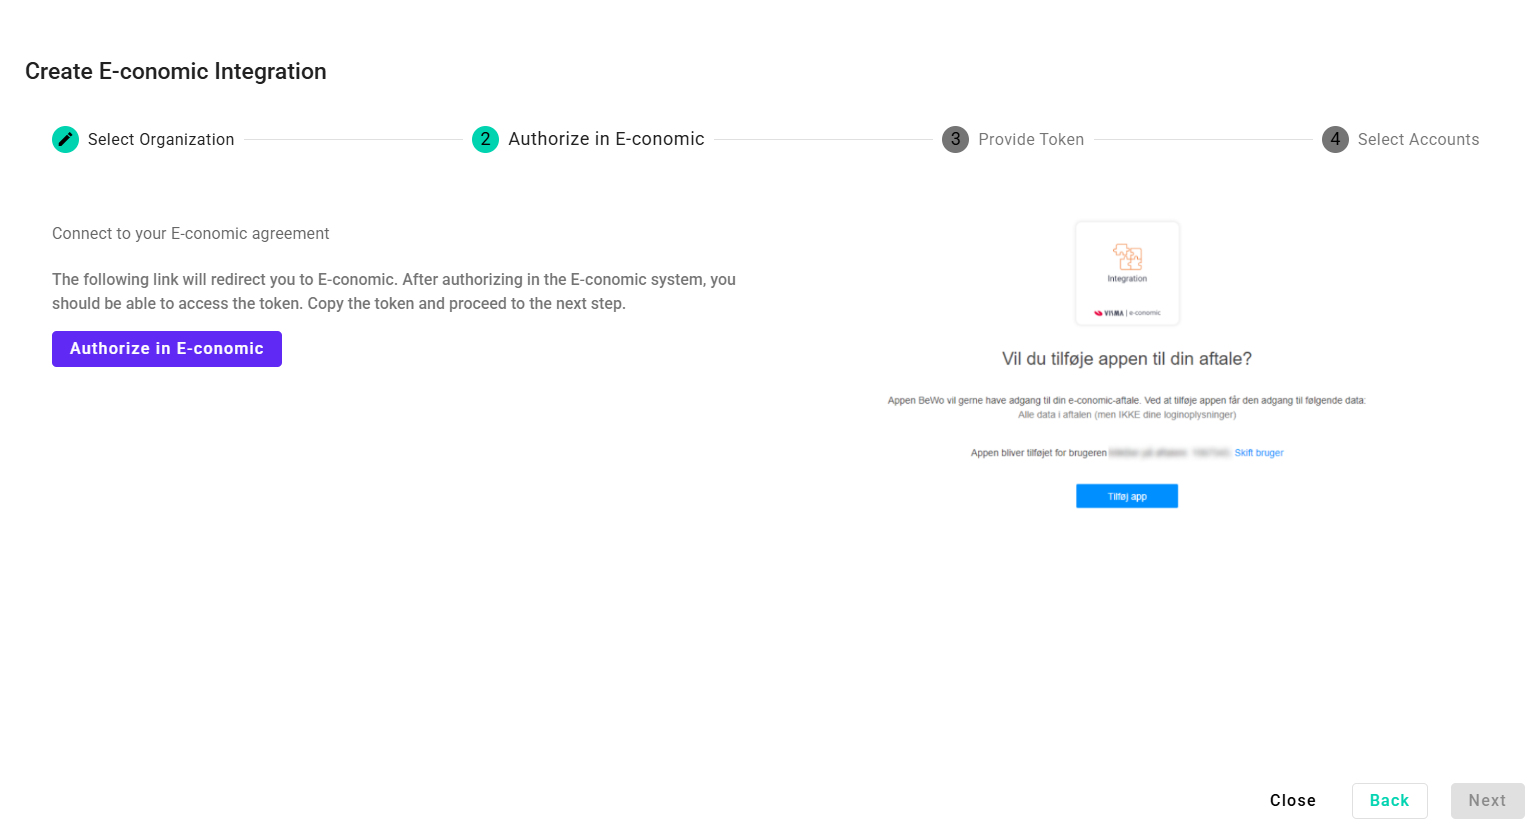
- You will be redirected to the e-conomic webpage where you should log in to your account.
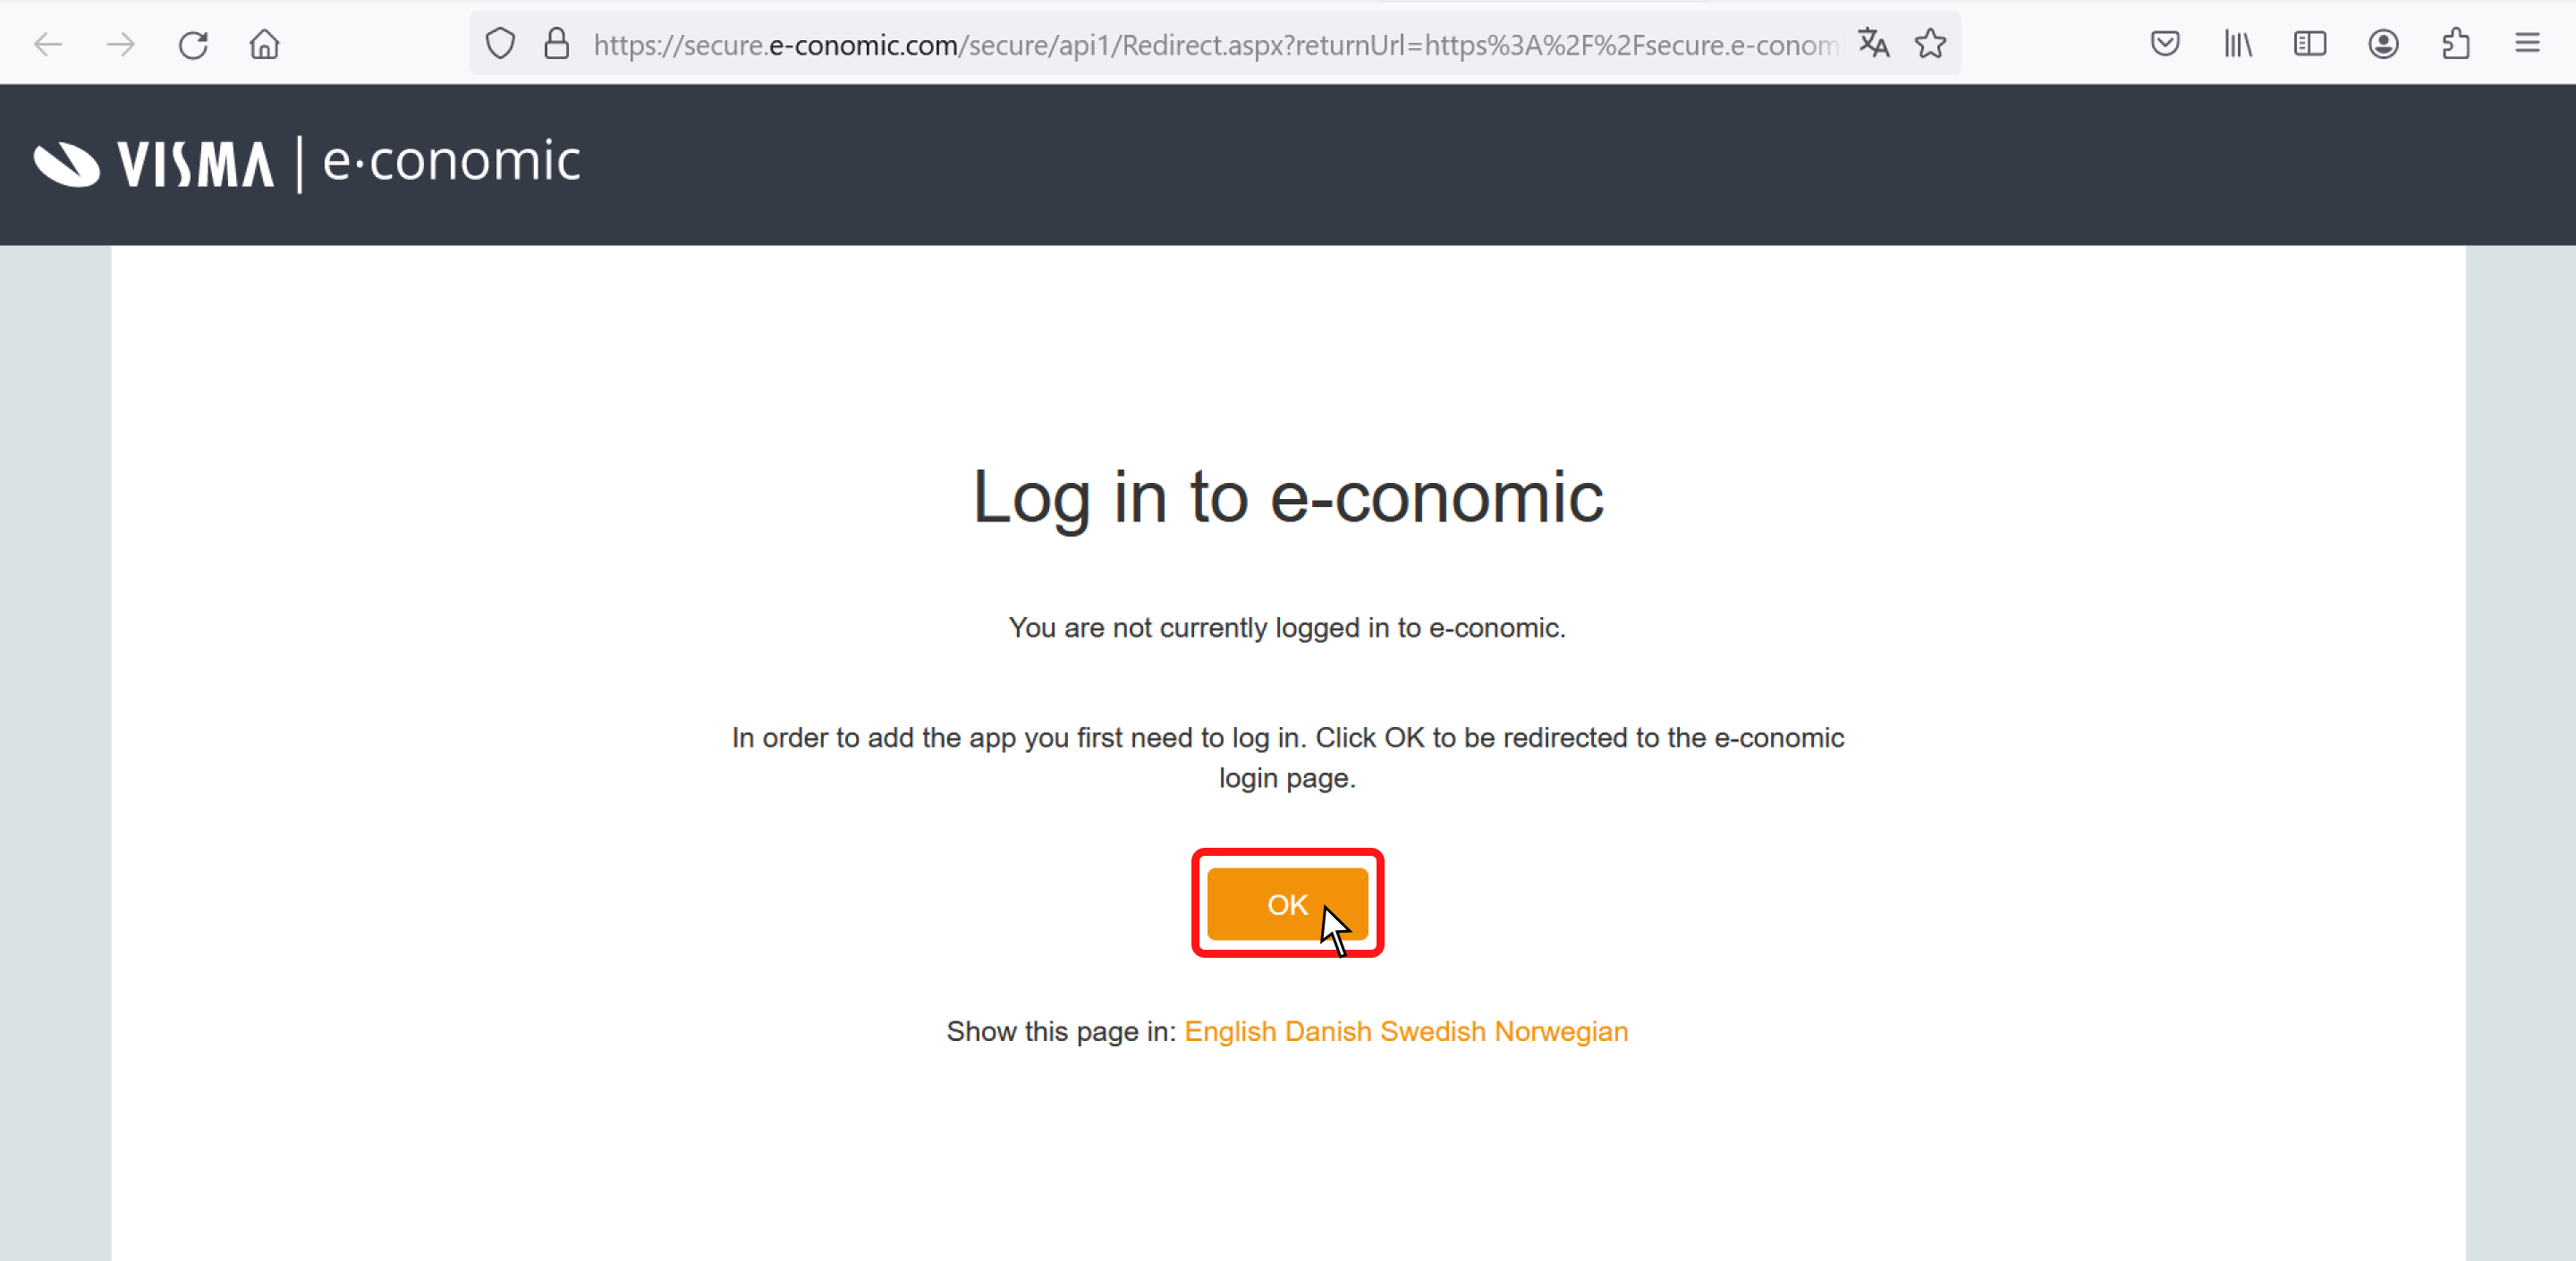
If you have more than one e-conomic agreement, you should make sure that you have selected the correct agreement. You can do this by logging out and logging back into the correct agreement.
- Once logged in, you’ll be asked to add the BeWo app to your e-conomic account. Click the button to proceed.
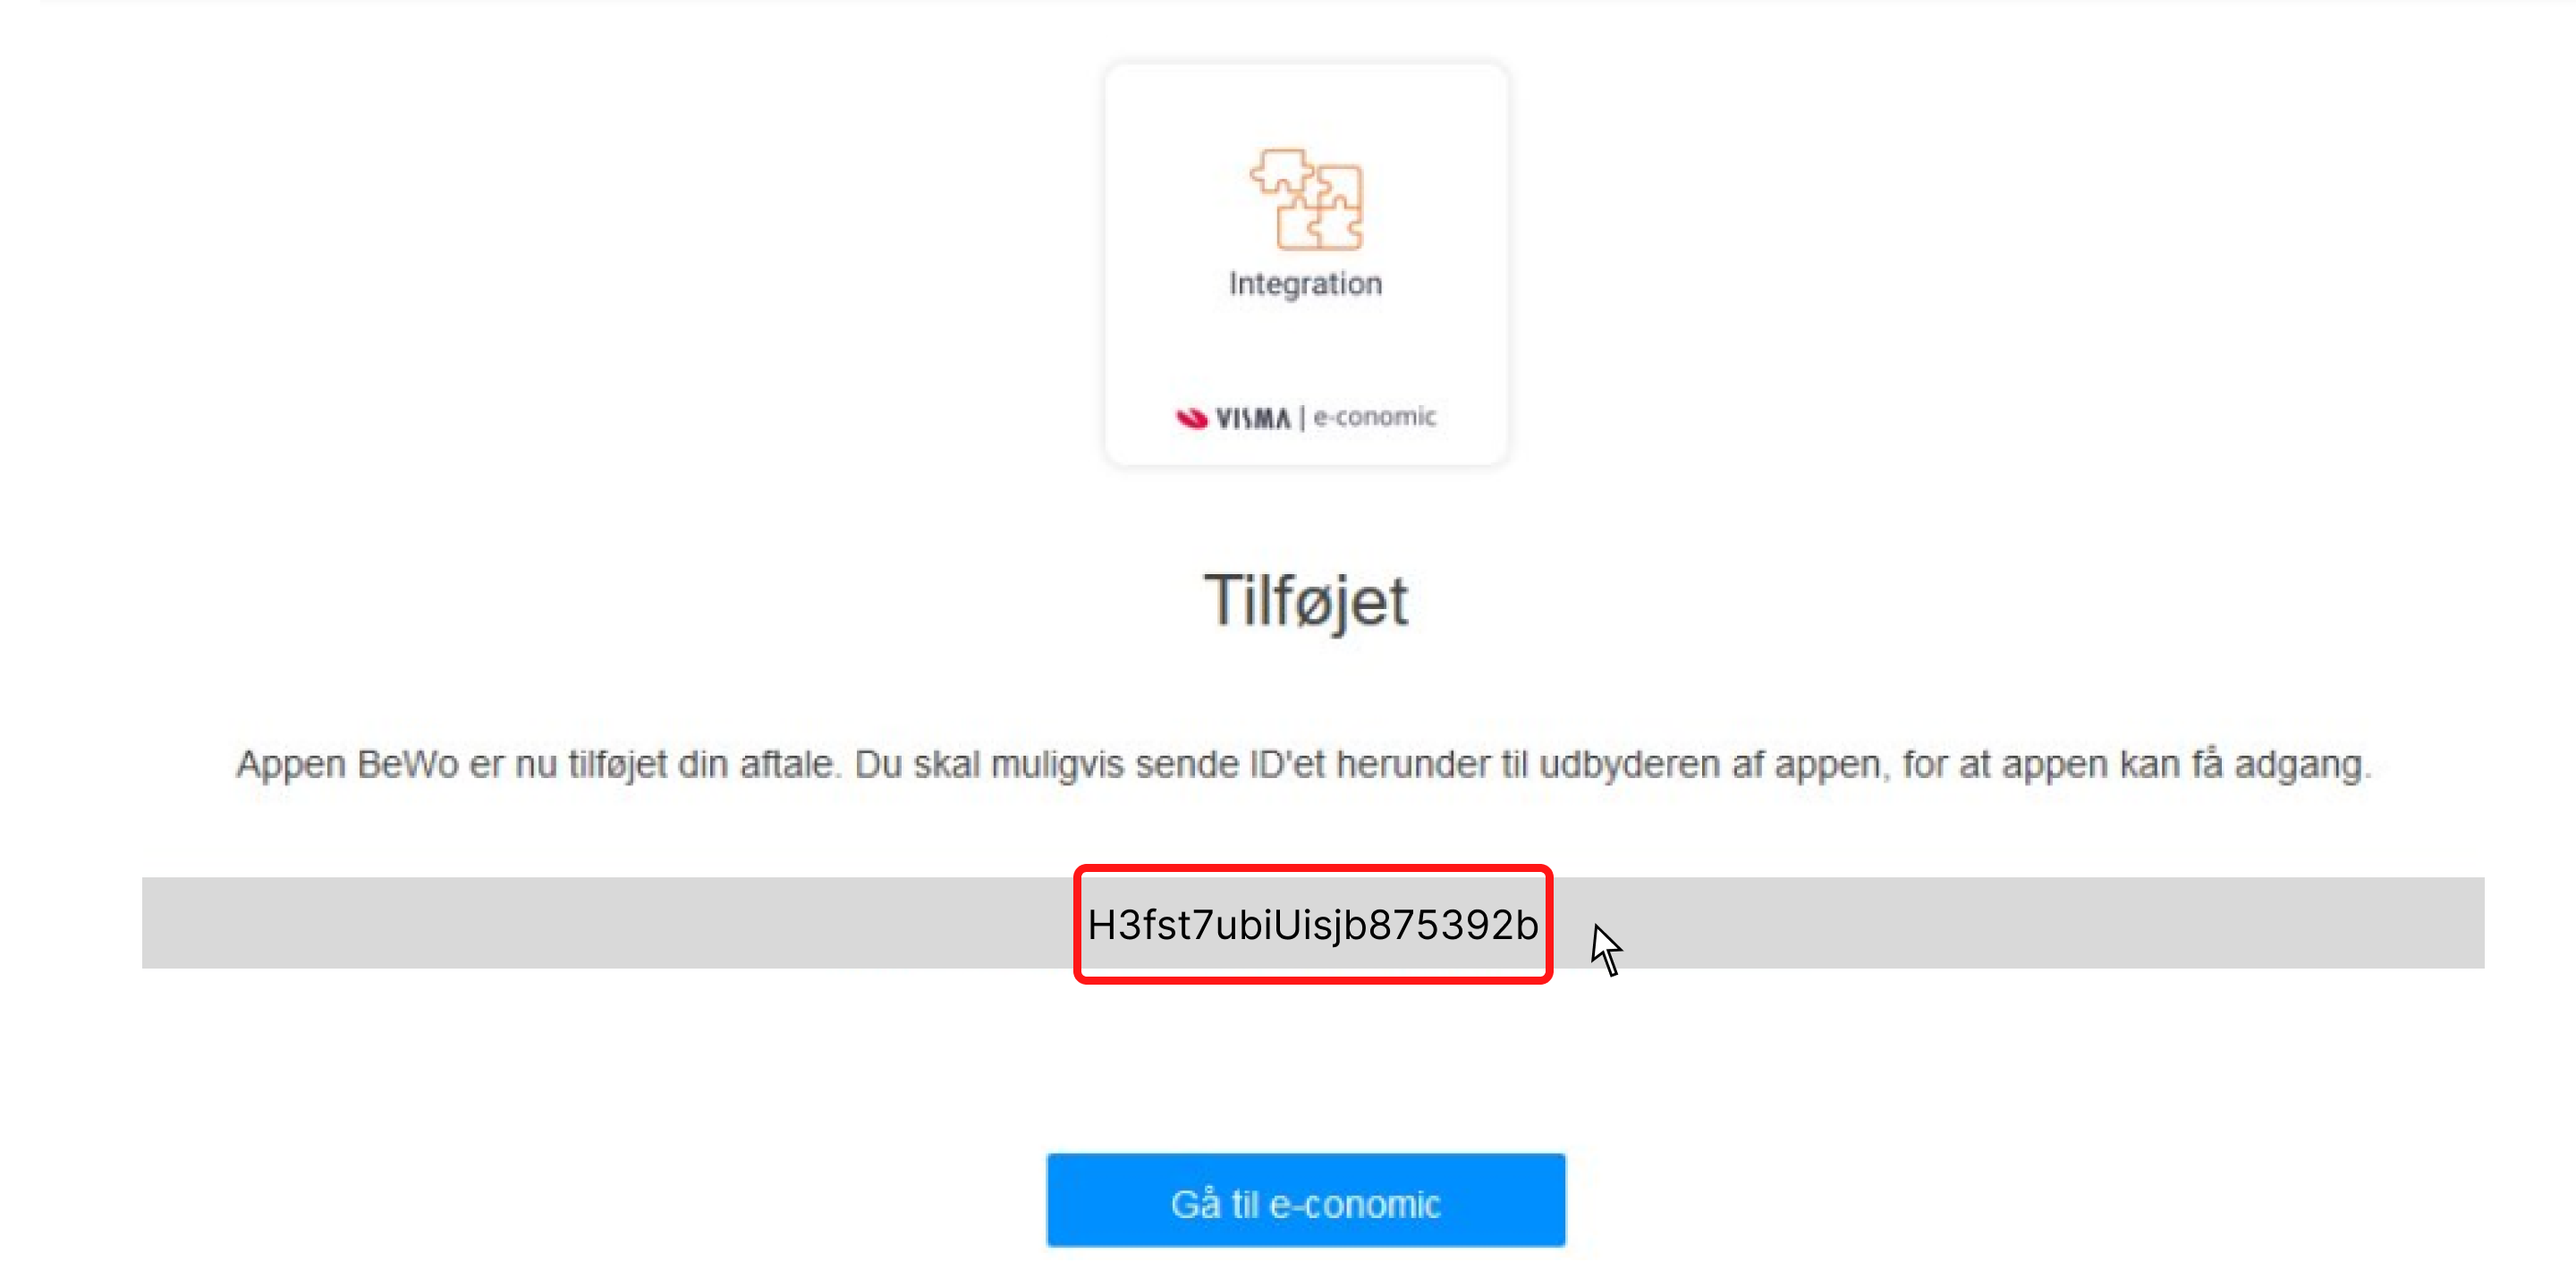
- After adding the app, a token will be presented to you. Copy this token for the next step.
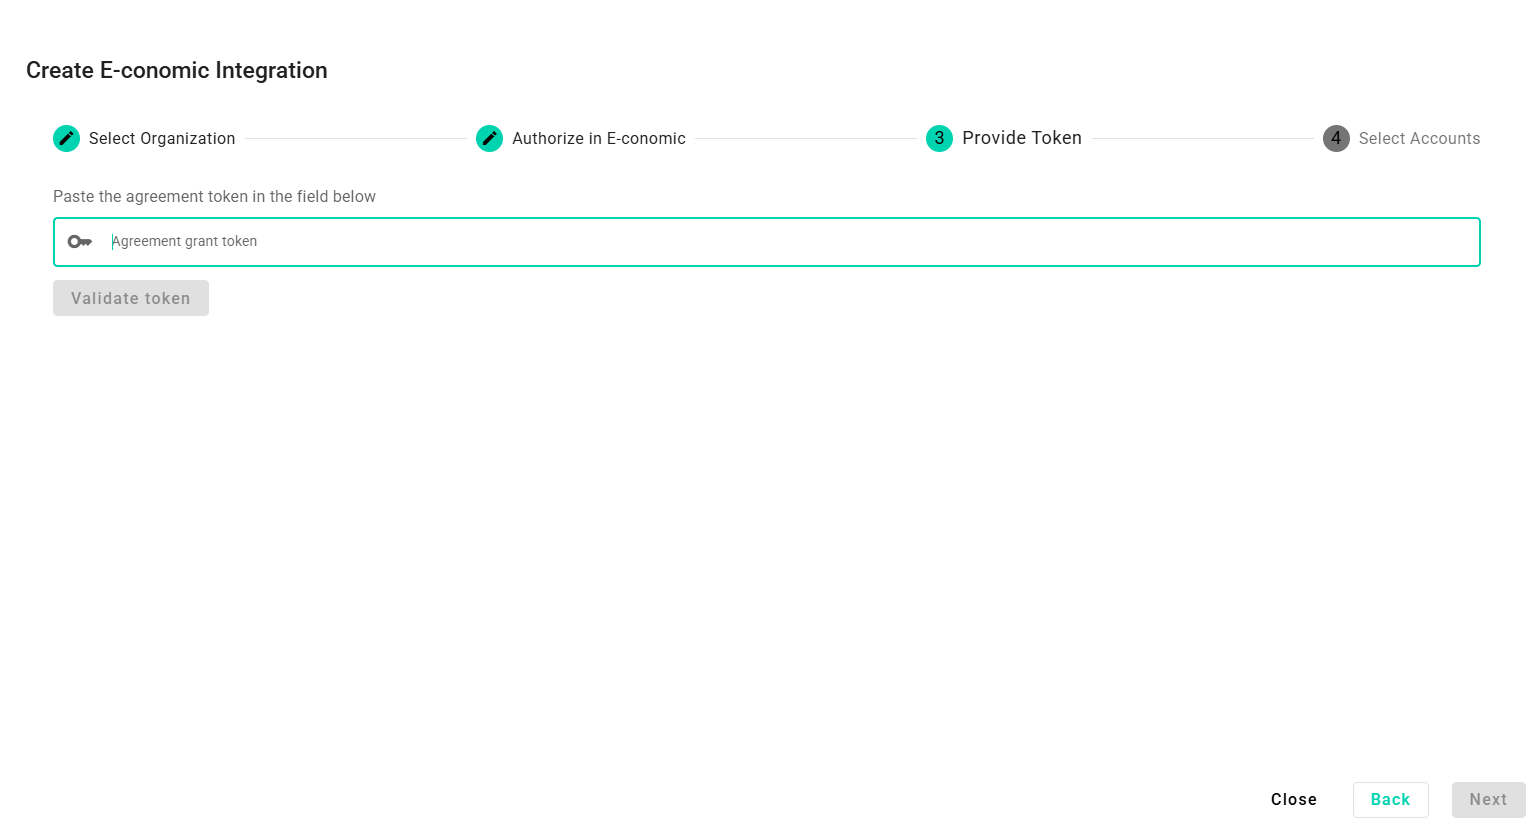
Step 3: Insert e-conomic token
- Return to the BeWo platform and click “Next” to advance to step 3.
- Insert the copied token into the field labeled “Agreement grant token”.
- Click “Validate token” to authorize your access.
- After successful validation move to next step by clicking “Next”.
Step 4: Select e-conomic accounts and Create Integration
- In this step you have to select the relevant e-conomic accounts that you want to include in your calculations.
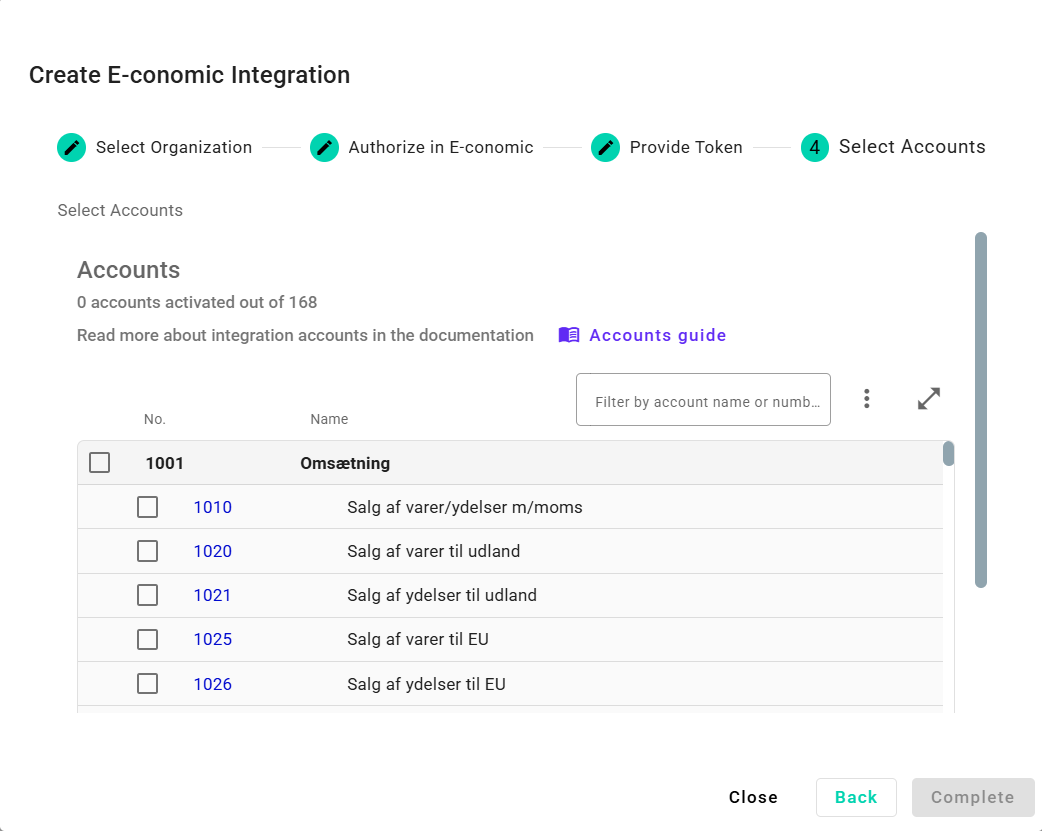
- Click “Complete” to finallize your integration setup.
Step 4a: Accounts to Include
You can use the following guidance as a rule of thumb, but every system will look differently based on the setup.
| Account Category | Description | |
|---|---|---|
| Direct Expenses | Both with and without VAT | ✅ |
| Goods for Personal Use | Personalegoder (Danish) | ✅ |
| Multimedia Expenses | Multimedia tools and platforms | ✅ |
| Mileage Allowance | Kilometergodtgørelse (Danish) | ✅ |
| Employee Expenses | Restaurant visits, gifts, travel, etc. | ✅ |
| Advertising | Marketing and promotional costs | ✅ |
| Freight Costs | Freight costs in connection with distribution of product or just e-commerce shopping | ✅ |
| Fuel | Fuel consumption expenses | ✅ |
| Car Operations | Operating company vehicles | ✅ |
| Insurance | Insurance costs | ✅ |
| Utilities | Electricity, water, heating | ✅ |
| Maintenance and Cleaning | Upkeep of company premises | ✅ |
| Office Supplies | Daily office materials and supplies | ✅ |
| Newspapers and Subscriptions | Newspapers and any subscriptions | ✅ |
| Software | Software licenses and subscriptions | ✅ |
| Furniture | Office or company furniture | ✅ |
| Telecommunications | Phones, IT hardware, internet services | ✅ |
| Professional Services | Auditor, lawyer, consultant fees | ✅ |
| Books and Publications | Books and publications | ✅ |
| Memberships | Membership fees from interest organizations and other | ✅ |
| Website Hosting | Hosting the company website | ✅ |
Step 4b: Accounts to Exclude
| Account Category | |
|---|---|
| Payroll | ❌ |
| Holiday Pay | ❌ |
| Pension Contributions | ❌ |
| Maternity Leave Payments | ❌ |
| Fees and Commissions | ❌ |
| Taxes | ❌ |
| Interest Payments | ❌ |
| Loans and Financing | ❌ |
| Bank Accounts | ❌ |
| Charges and Tolls | ❌ |
| VAT | ❌ |
| Receivables | ❌ |
Completing the Integration
Once the integration is created, BeWo will automatically collect the necessary data from your e-conomic account, facilitating accurate and efficient sustainability reporting. This seamless connection ensures that your reporting is as comprehensive and straightforward as possible.